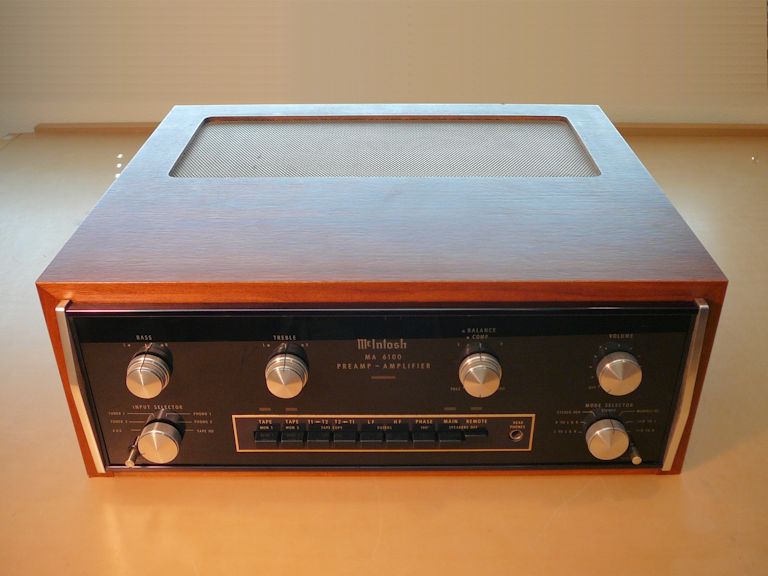
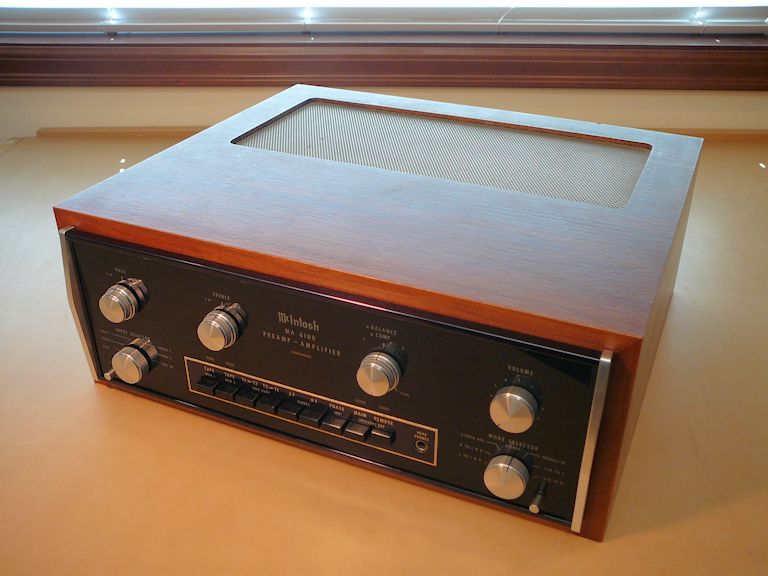
McIntosh Model MA6100 Integrated Amplifier (1977)


This McIntosh model MA6100 integrated amplifier pairs nicely with my
McIntosh MR71 FM tuner. The MA6100 amp is a few
years newer and it uses solid-state components, while the MR71 tuner uses tubes,
but together, they make beautiful music.
When I created a Radio/TV display room, I
wanted a sound system for that space. After finding a pair of Klipsch Quartet
speakers, I ran across this amp in a craigslist
post and decided to bring it home. The amp's cosmetic condition was great and it
came with an original wooden cabinet.


Description
The MA6100 is an integrated amp, meaning that it combines a preamplifier with an amplifier.
Nowadays, most amplifiers are integrated, but that wasn't always the case. For
instance, my 1957 Heathkit W-6M amp is nothing but an amplifier, and
it relies on a preamp such as the Heathkit WA-P2 to
switch between different input sources, control volume and tone, and provide an initial
stage of amplification.
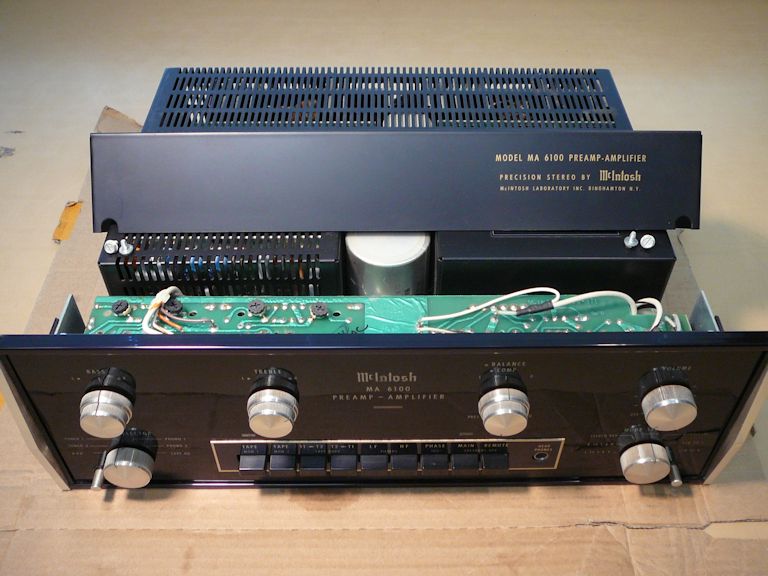
The MA6100 provides the same functions in a single package. It is a stereo amp, providing
70 watts per channel, with provision for two sets of speakers as well as headphones.
It has various tone controls and it accepts as many as six inputs (Aux, Tuner 1, Tuner 2, Phono
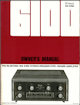
1, Phono 2, Tape Head). Here is the MA6100 owner's manual, with many details and
diagrams:
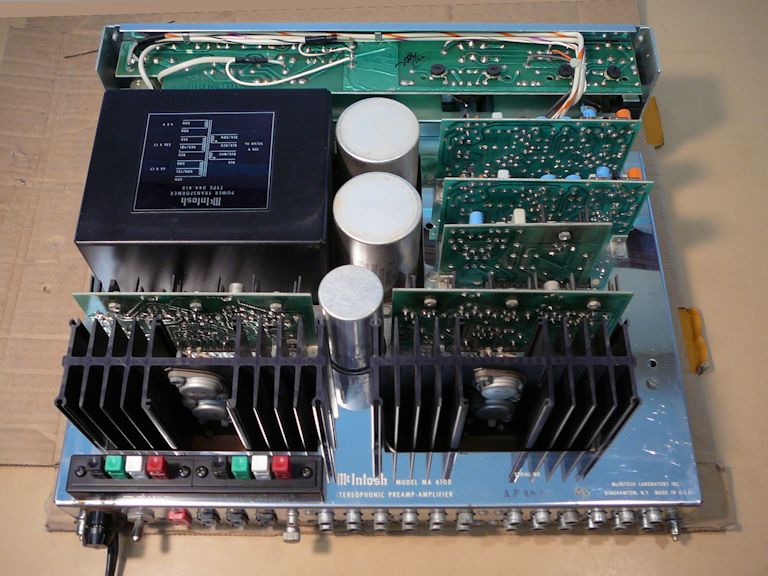
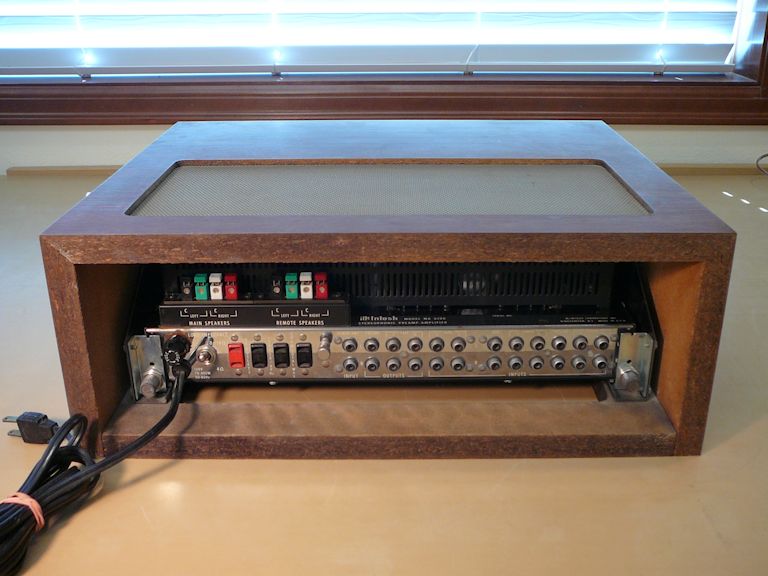
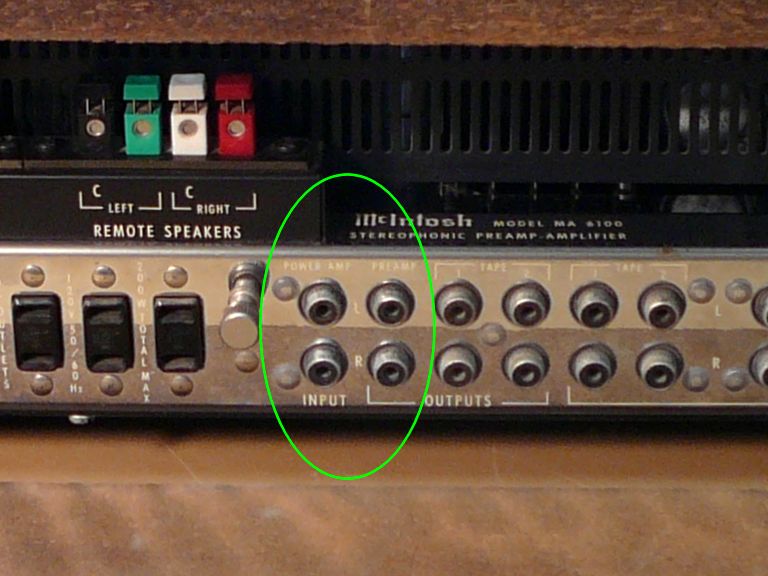
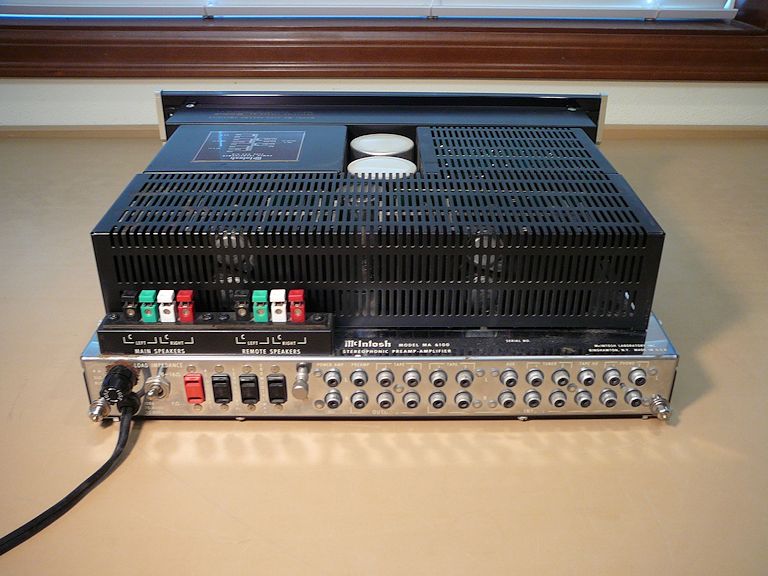
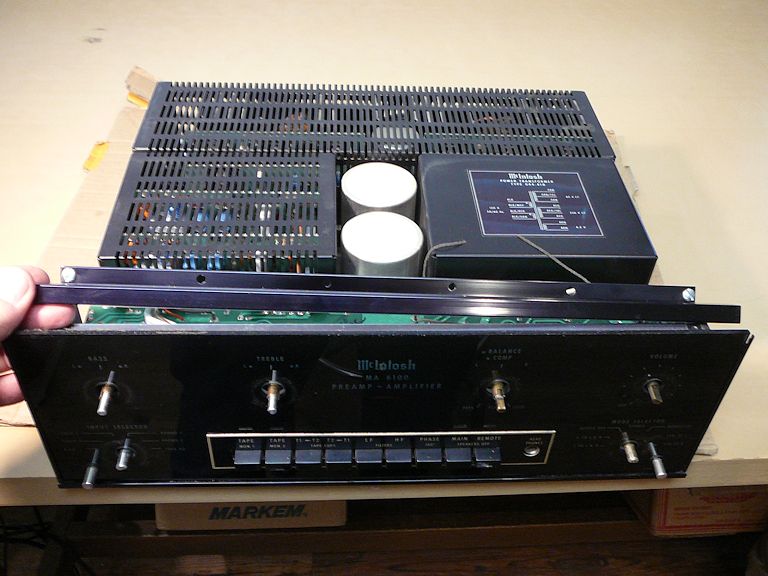
A peek at the rear panel shows that the preamp and amp are indeed separate devices
built on a single chassis. For normal operation, you connect jumpers (or ordinary RCA cables) between
the preamp output and power amp input jacks:

This amp was sold from 1972-1979, with a final list price of $699. There were two production runs
of the MA6100, from 1972-1975 (serial numbers AE1001-AE9852) and from 1975-1979 (serial numbers AP1001-AP6798).
Mine has serial number AP4839, making it a late unit. The McIntosh History
website has more info about the chronology and features of McIntosh products.
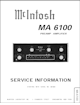
Here is the MA6100 service manual:
Servicing the MA6100
When I got it, my MA6100 was an unmodified, original-owner unit that "mostly worked" but needed
some maintenance. Its volume control was quite scratchy and a few other controls seemed funky.
No doubt, all the switches and controls could benefit from cleaning. The amp had some dead pilot lamps, too.
I'll deal with the obvious issues and then do a close inspection to see if it needs more work.
Although it's newer than most items in my collection, this amp is about 40 years old. During
four decades, controls and switch contacts can become oxidized and electrolytic
capacitors can dry out.
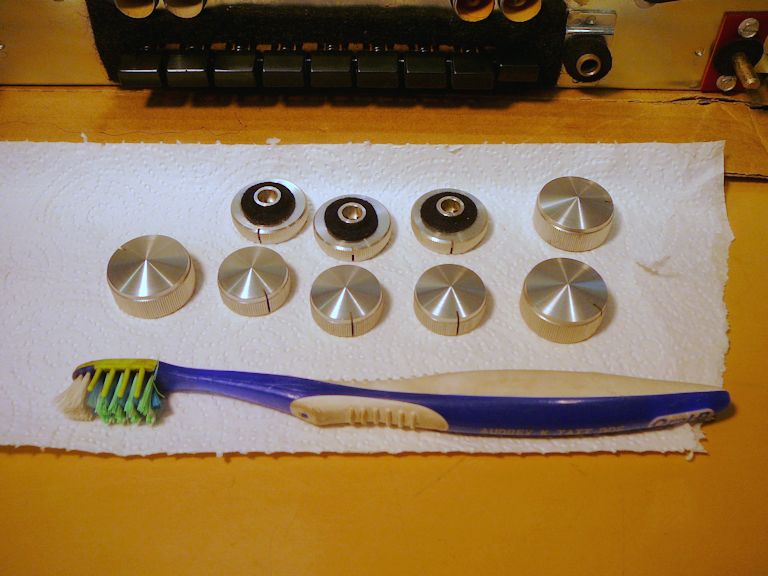
When you open the amp for service, it's an ideal time to give everything a thorough
cleaning. All that you need to clean the knobs is a toothbrush and rubbing alcohol:

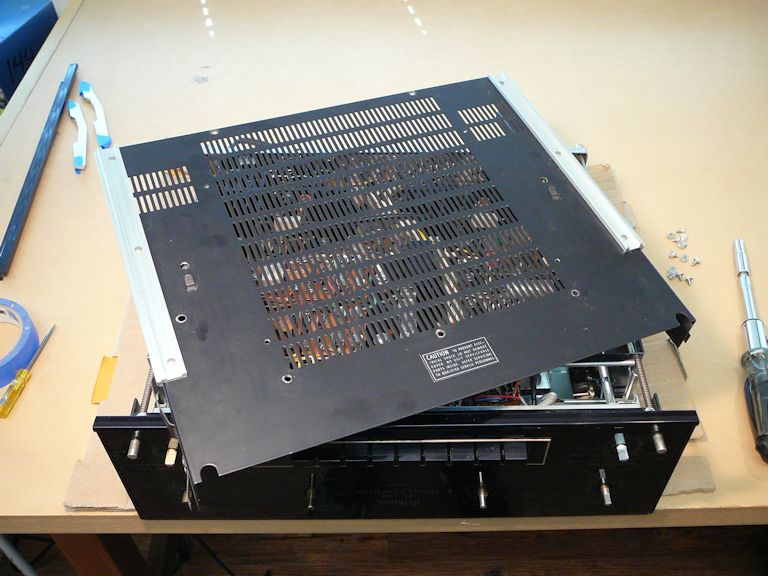
Working on the chassis may require removing the shields on top. Here, the shields are shown
in place:


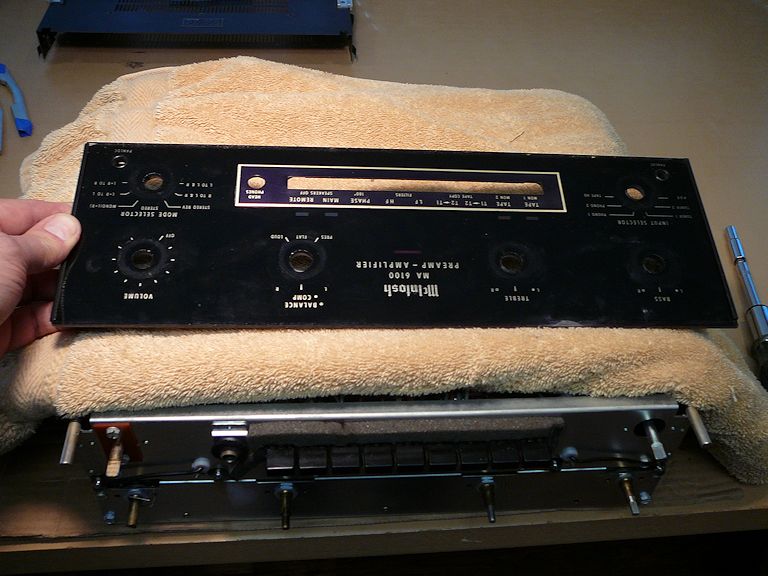
Removing this front shield exposes a narrow circuit board holding the volume control
and other top controls:

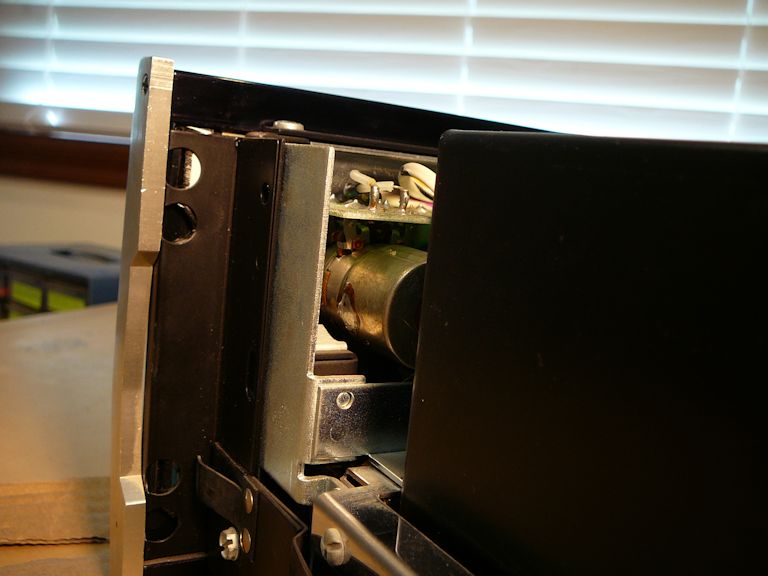
At this level of disassembly, the volume control is not easy to reach. I would
ordinarily spray a little DeOxit cleaner into the slots where the solder terminals
enter the control case, but that area is tucked away under the circuit board:

Perhaps removing more parts will let me lift that board to reach the control with
a DeOxit spray nozzle. I'll need to do this disassembly anyway, since you must
remove the glass front panel to change the pilot lamps behind it.
As you remove parts, make careful notes of where all their screws belong.


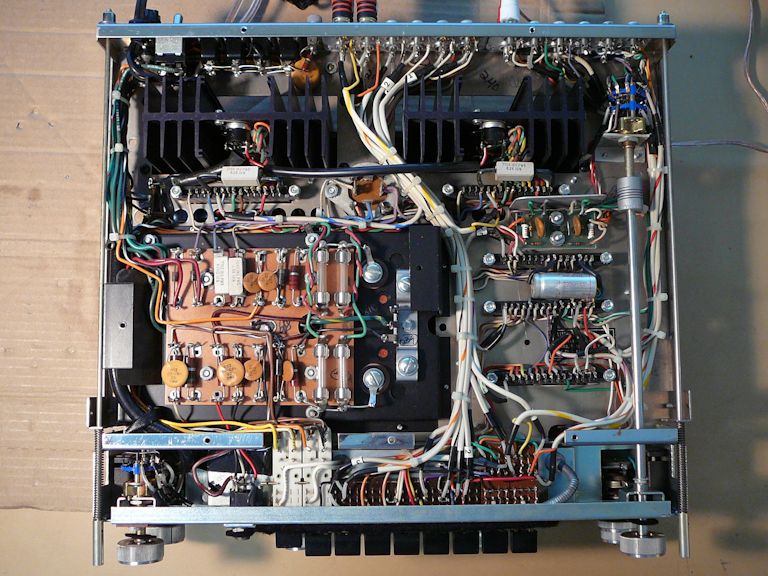
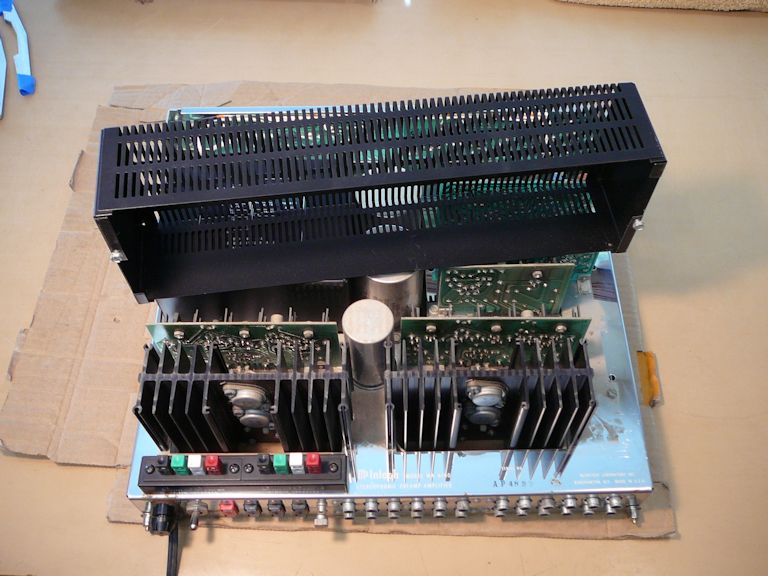
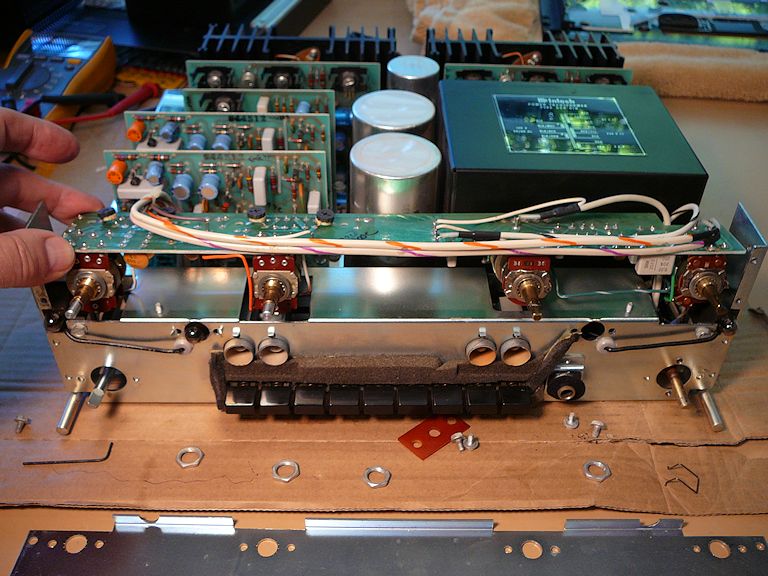
Detaching the bottom cover opens the chassis underside, giving access to the nuts
that secure the ventilated top shields:


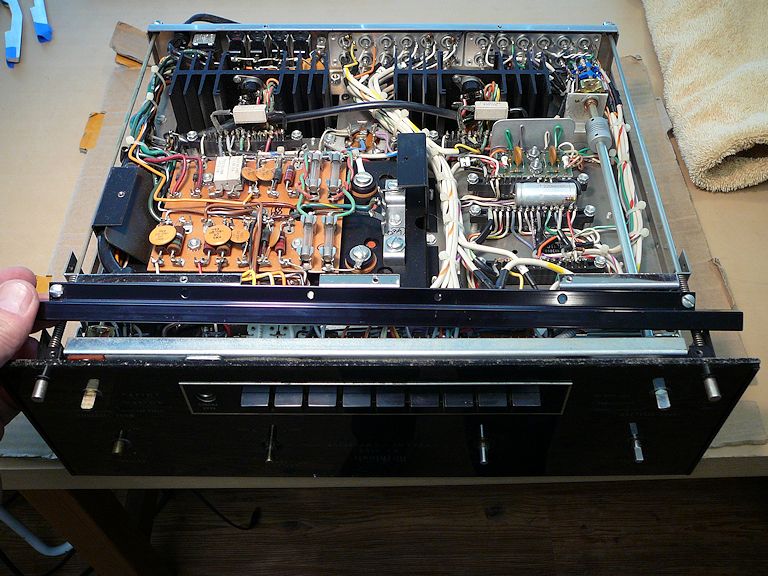
With shields removed, I can access the five plug-in circuit boards and the
narrow board holding the top controls:
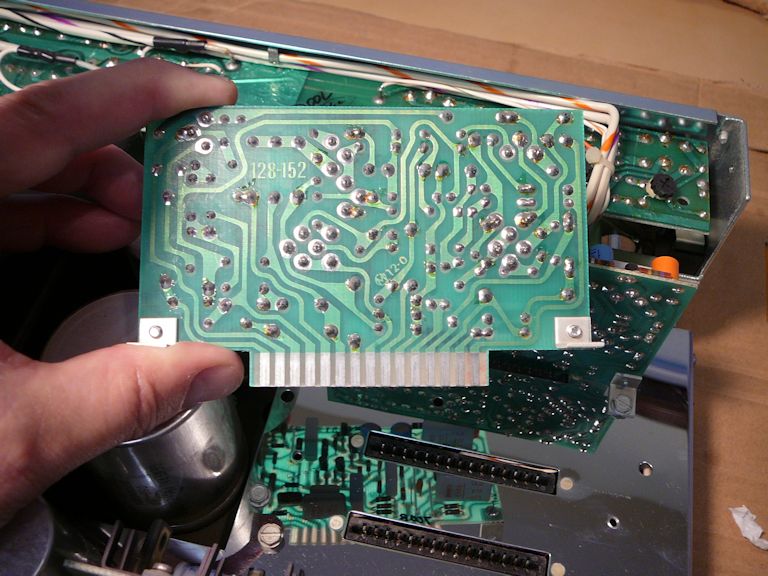
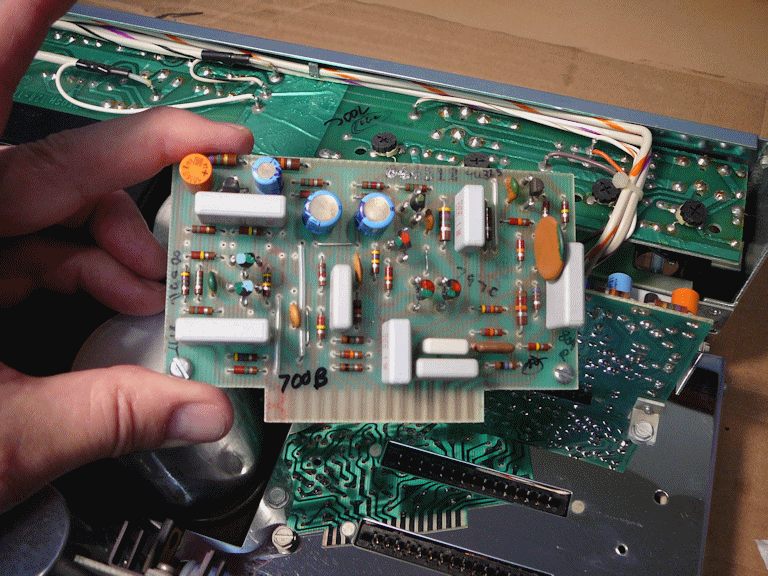
Here are front and back views of one of the plug-in boards:

Although the board edge contacts looked clean and unoxidized, I cleaned
all the board and socket contacts, anyway. I also did in-circuit checking of the boards'
electrolytic capacitors with my EDS 88A cap analyzer, finding nothing amiss.
These are good signs, consistent with a well-cared for amp, perhaps one that
didn't see much use.
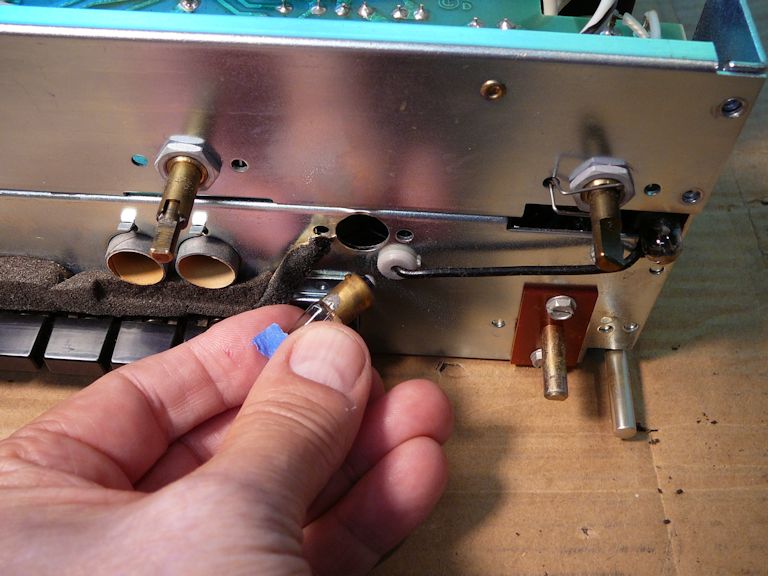
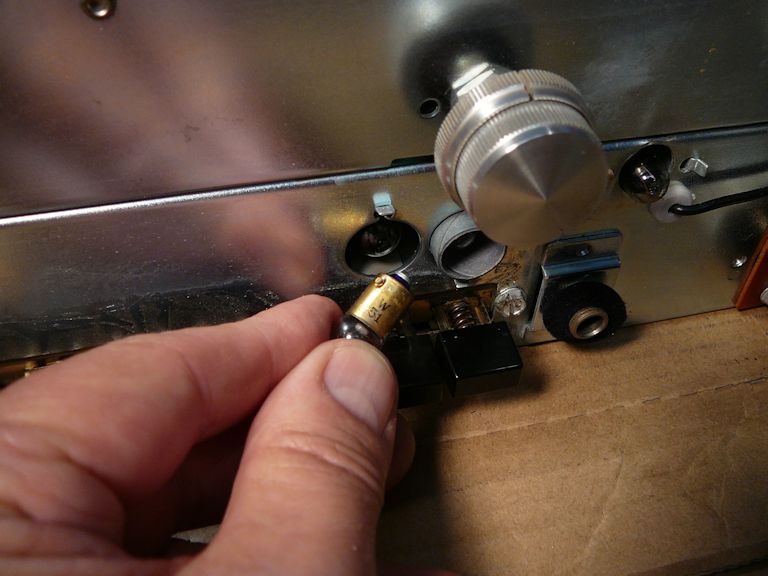
With the front panel off, I can deal with the burned-out pilot lamps. These lamps
are deeply recessed and the bayonet socket requires you to push a lamp in and turn it, before it comes free.
I used a twist of tape to help grab the lamp for this maneuver:

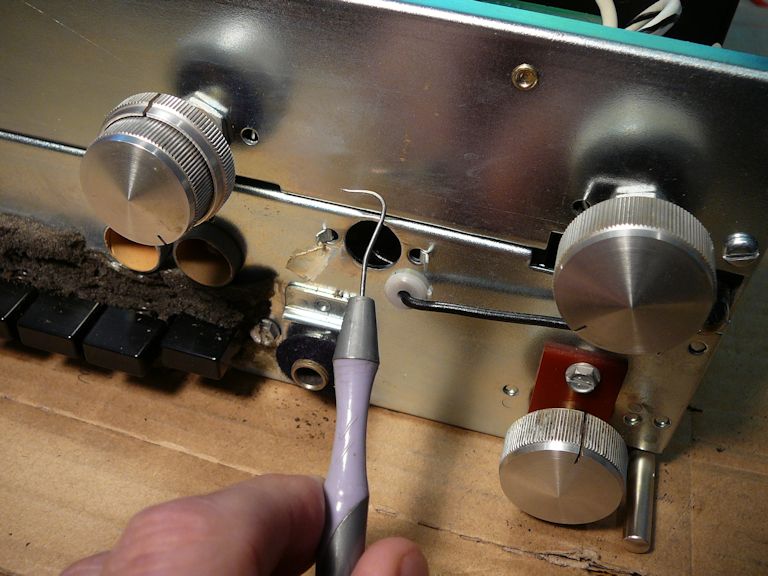
With my trusty dental pick, I could reach back into the recess and hook the
lamp socket to reposition it on the panel:

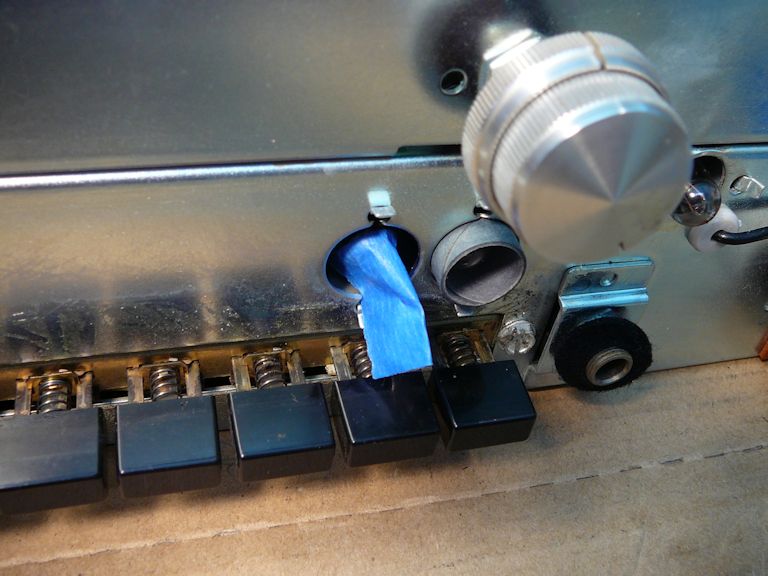
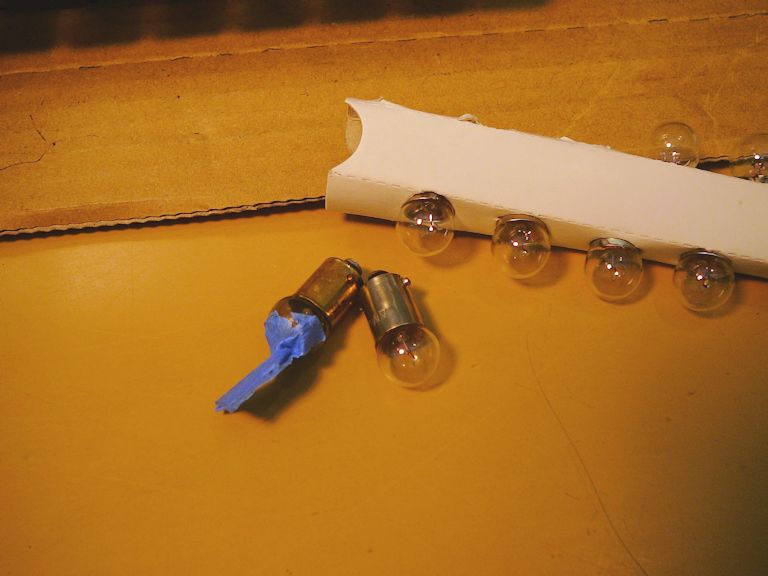
I can easily deal with other dead lamps using the tape trick. After each new lamp was in place,
I cleaned it with a Q-tip and alcohol, to make sure it didn't hold any tape residue:


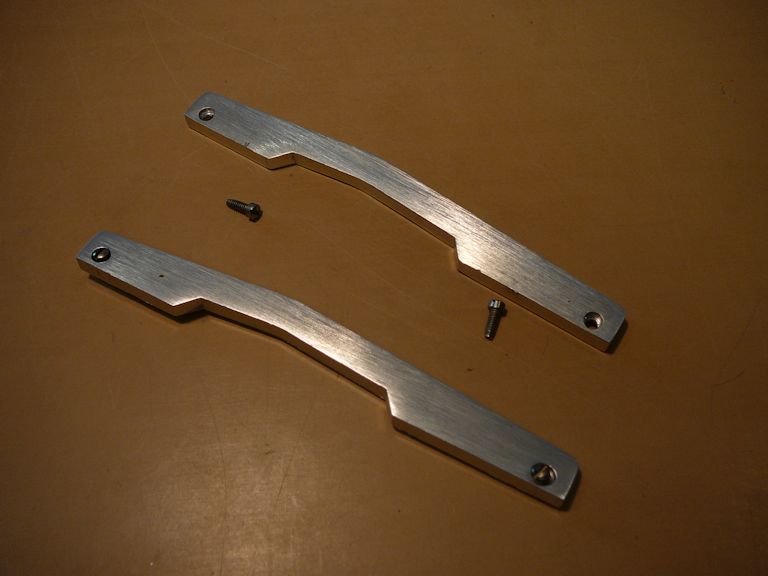
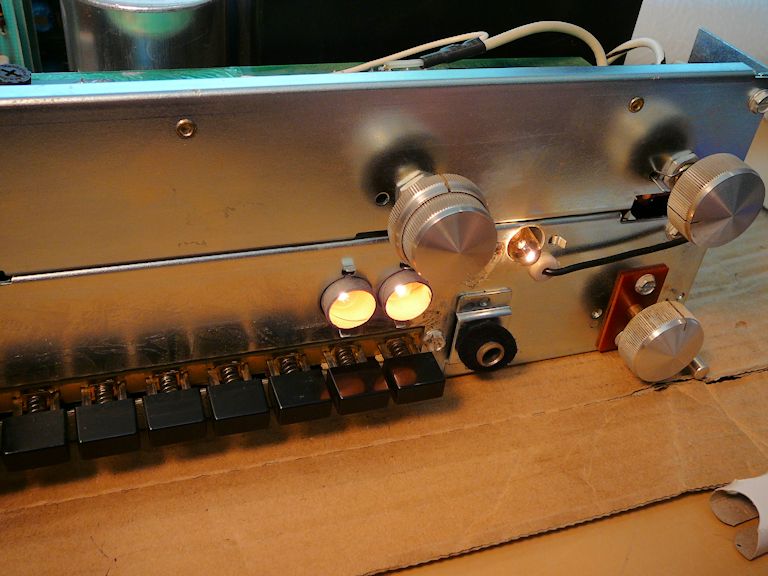
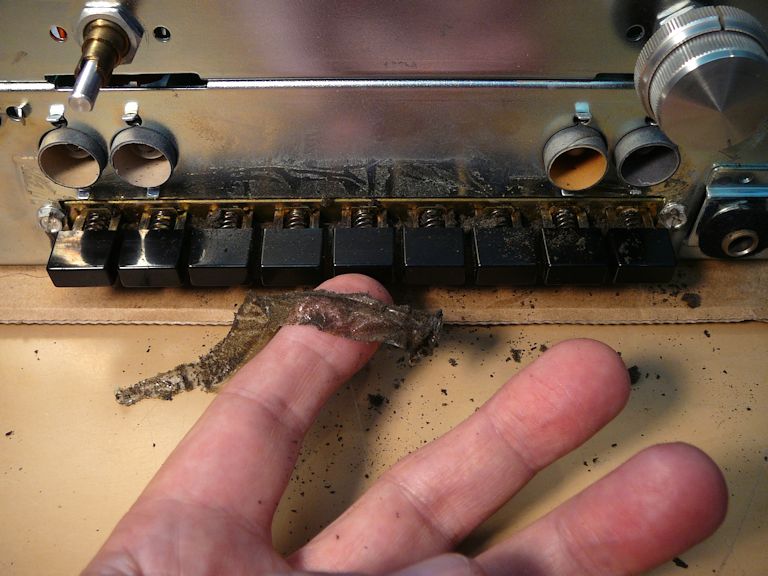
In previous photos, you may have noticed the crumbly foam strips surrounding the bottom
row of pushbutton switches. Instead of keeping dust out, as intended, this self-destructing foam
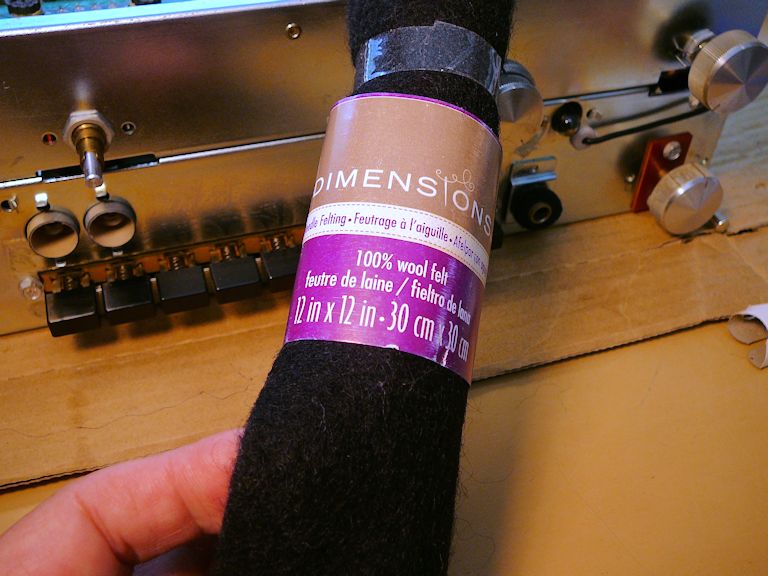
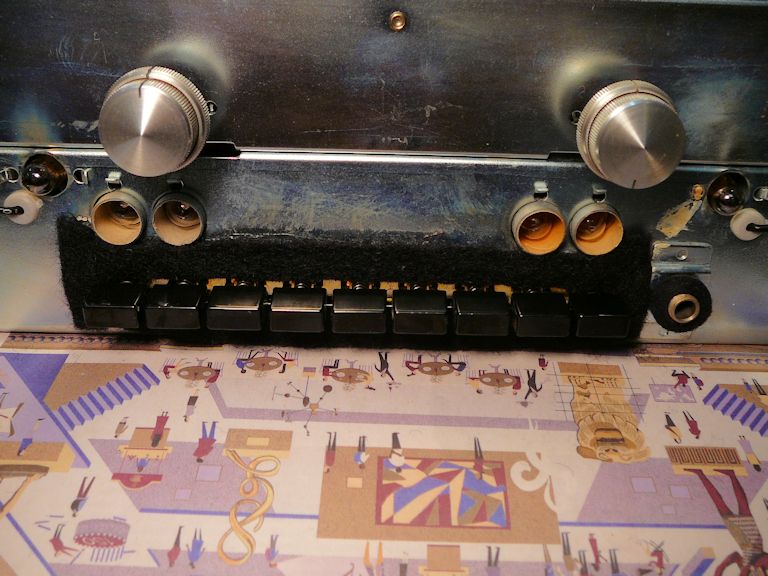
is making a big mess of its own. I removed it and glued on new anti-dust strips made of thick
felt from a craft store:


I also cleaned the pushbutton switches with DeOxit.
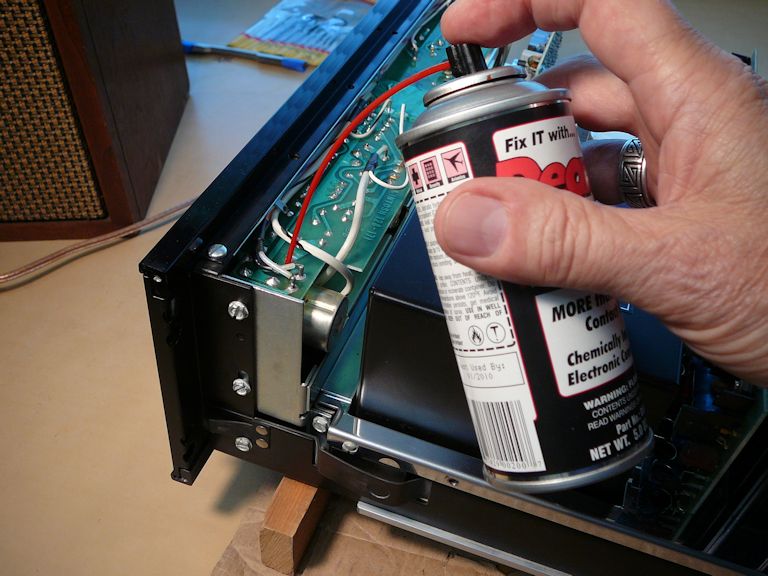
After removing the metal panel that holds the top row of controls, I can tilt their
narrow circuit board in hopes of getting better access for cleaning.

Even with the tiling and a little extra elbow room, it was very difficult to sneak the
spray nozzle up between the control cases and the circuit board, to get cleaner inside
the control without spraying it all over the neighborhood.
While staring at the board, I finally noticed the McIntosh made a simple provision for
this cleaning. The board has two little holes right above the control inlets, where
you can insert the spray nozzle:

With a mighty forehead slap, I gave all the controls a good cleaning and, after waiting for the
excess cleaner to evaporate, I tried the amp. It sounded fantastic! After giving the amp a longer
bench test, I proceeded to reassemble it.
If you only need to clean these controls on your MA6100, note that it can be done without removing the glass
front panel. Simply remove the shield above the board:
Cleaning the bottom row of switches does require removing the front panel,
as does replacing pilot lamps.
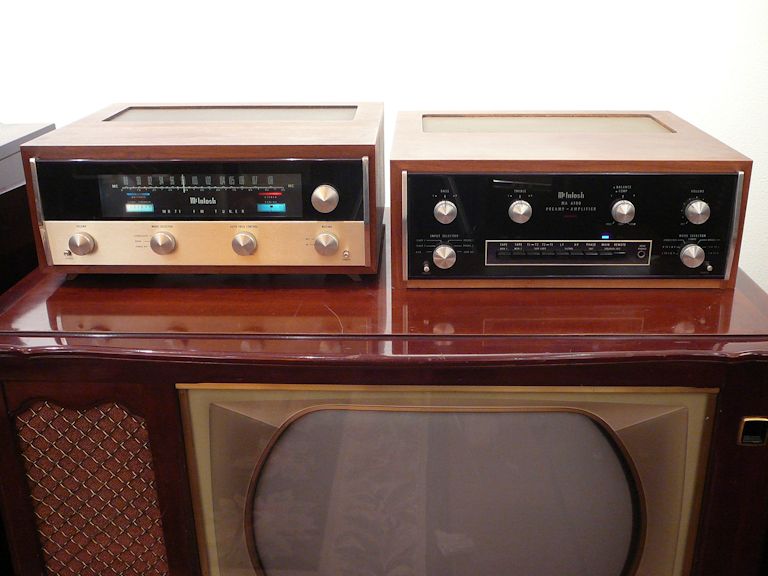
The final photo shows my MA6100 in use with my MR71 FM tuner, sitting on
my RCA CTC-7 color TV:
Final Thoughts
Since I did that maintenance, my MA6100 has performed flawlessly for many hours. My
radio/TV display room adjoins my workshop, so I can listen to this system from either room.
It's a magnificent upgrade from the assortment of shop radios that I have used over the last
20 years.
|