KLH Model Eight FM Radio (1962)


The KLH Model Eight FM radio is a prized collector's item, scarcer than the
Model Twenty One that succeeded it. Both were created
with one goal in mind: to make the world's best-sounding FM radio
in a compact tabletop cabinet.
Description
Designed by Henry Kloss and built in Cambridge, Massachusetts, the Model Eight was
produced from 1960-1965. Kloss had earlier co-founded the Acoustic Research
company, creator of the acoustic suspension speaker (a speaker sealed inside an
air-tight cabinet).
The Model Eight was Kloss's first radio. Using a transformer-type
power supply, it has a hand-wired chassis, employing seven tubes
(types 6U8A, 6BS8, two 6BM8, and three 6AU6A).
This set produces excellent sound for a radio of its size.
Mine sits in my office and I listen to it nearly every day. That's
quite a testimonial from someone who owns a houseful of radios.
Here are the Model Eight owner manual and schematic diagram:

KLH factory literature is skimpy. If anyone has found a more detailed
service manual, kindly send me an email.
You can read more about the Model Eight's development and features in this
article from Antique Radio Classified magazine.
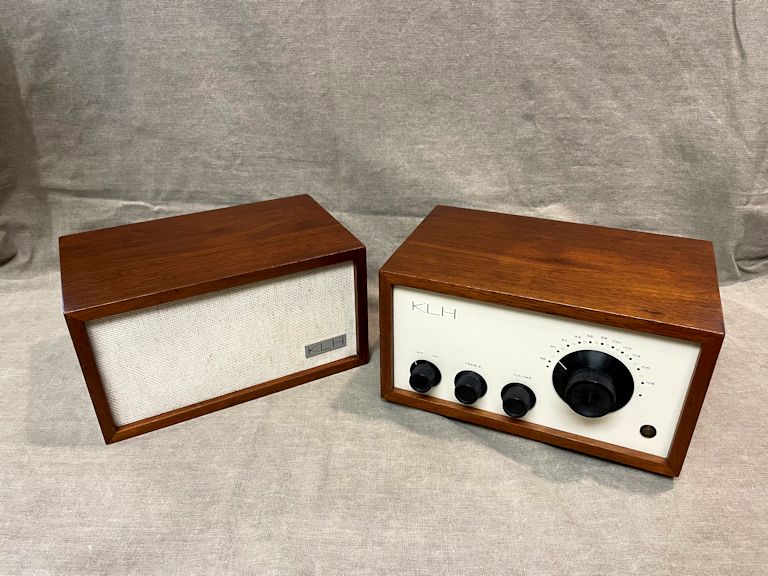
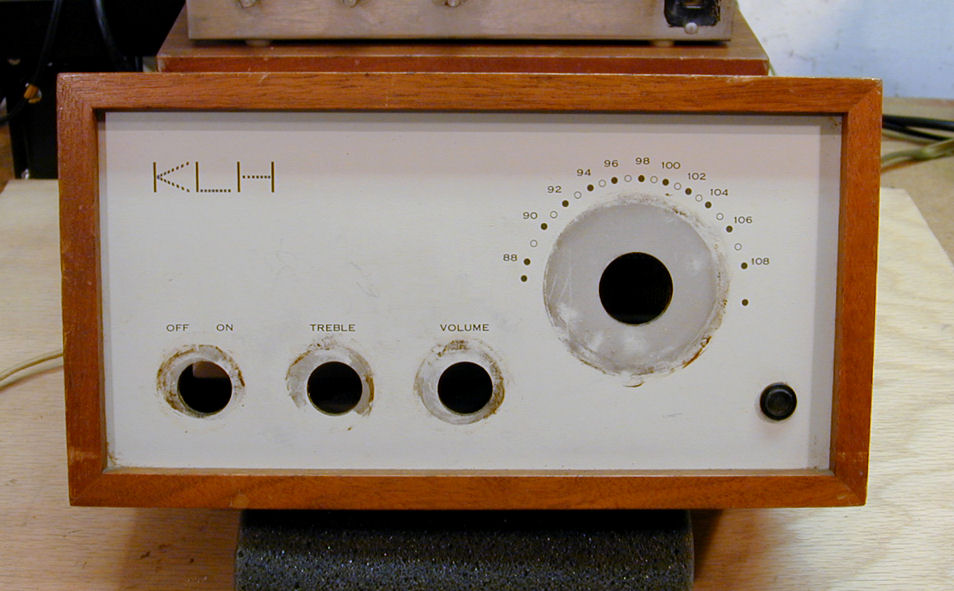
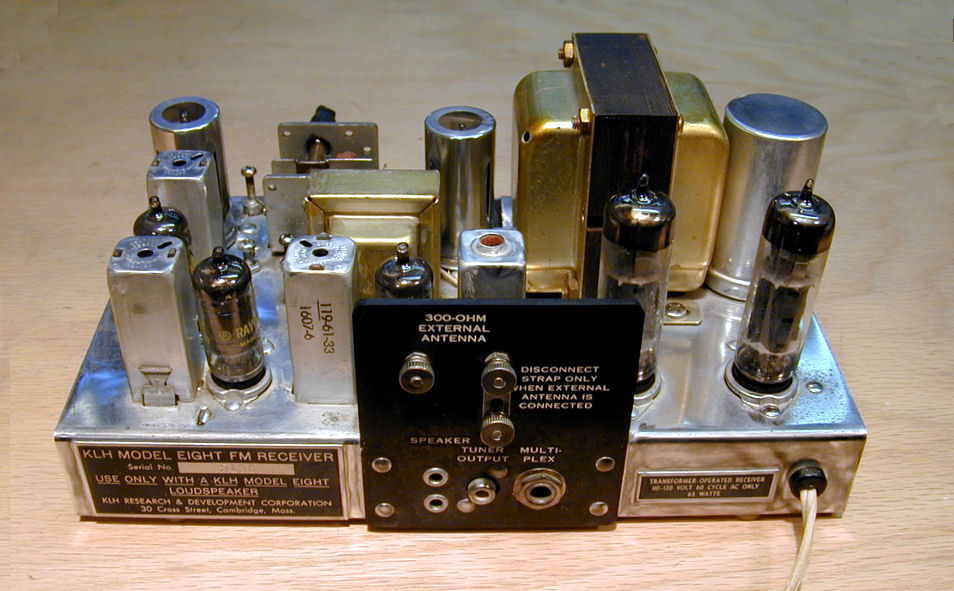
First Look
I found my Model Eight through a Craigslist ad
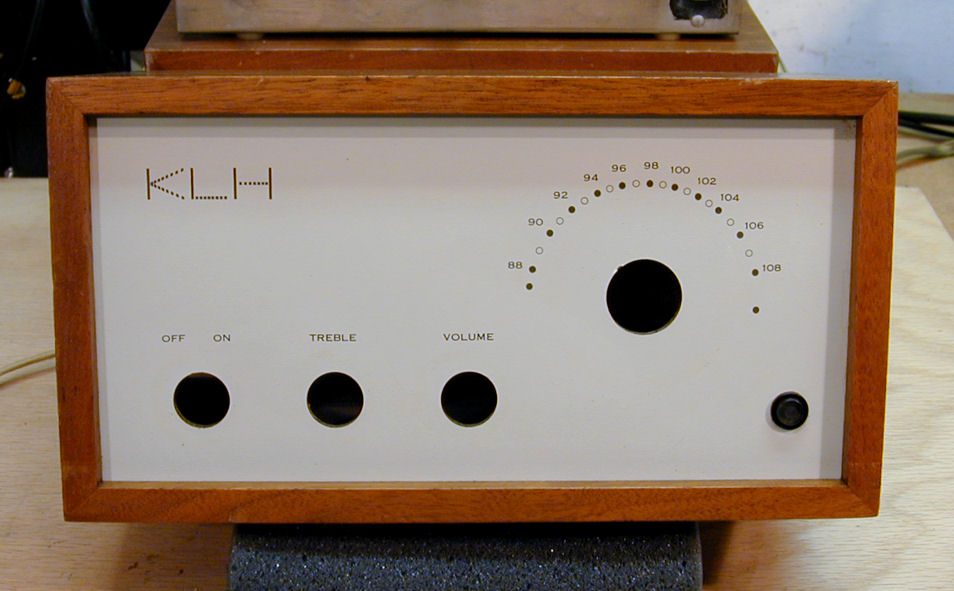
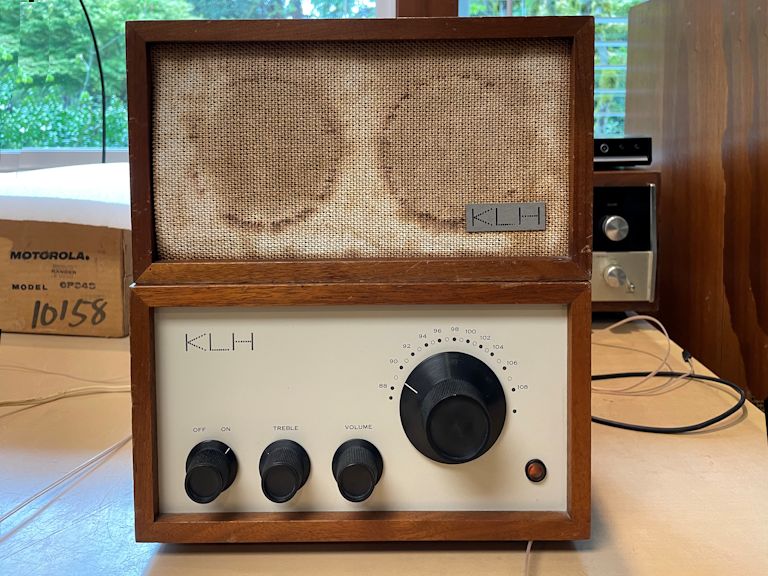
in November, 2011. Here is the radio before I did
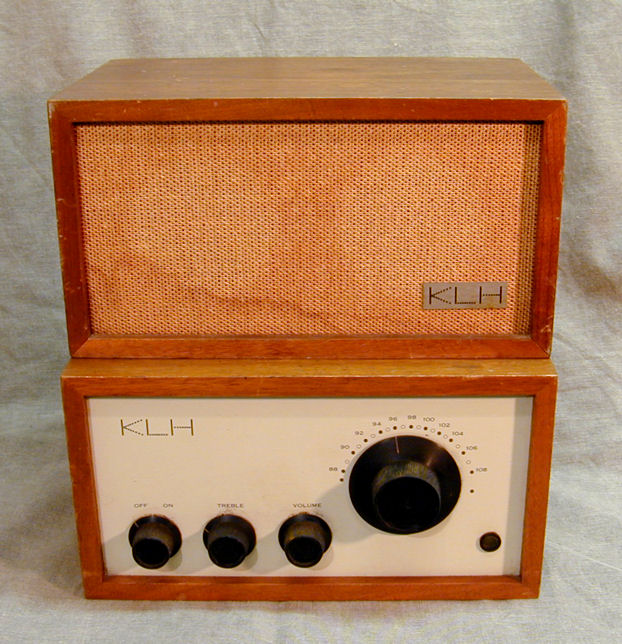
any cleanup or restoration. The radio and speaker are in identically
sized cabinets, which I stacked for these photos.
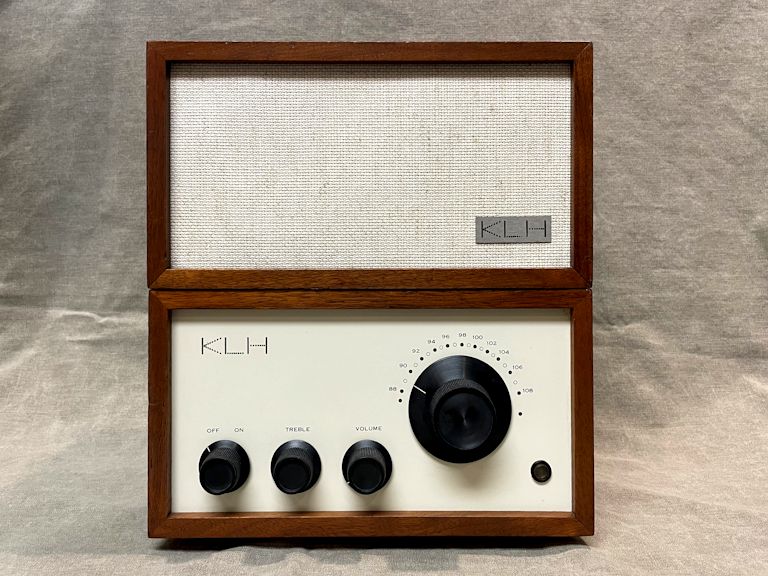
The front controls are simple: power, treble, volume, and tuning.


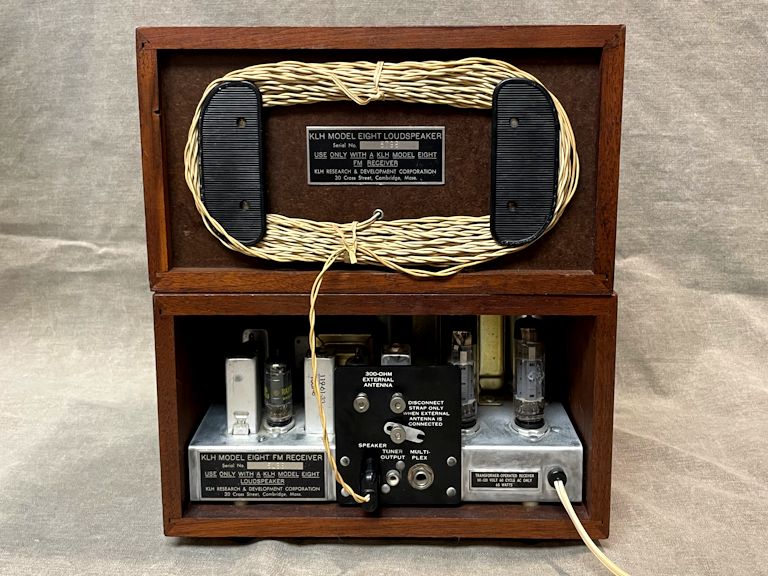
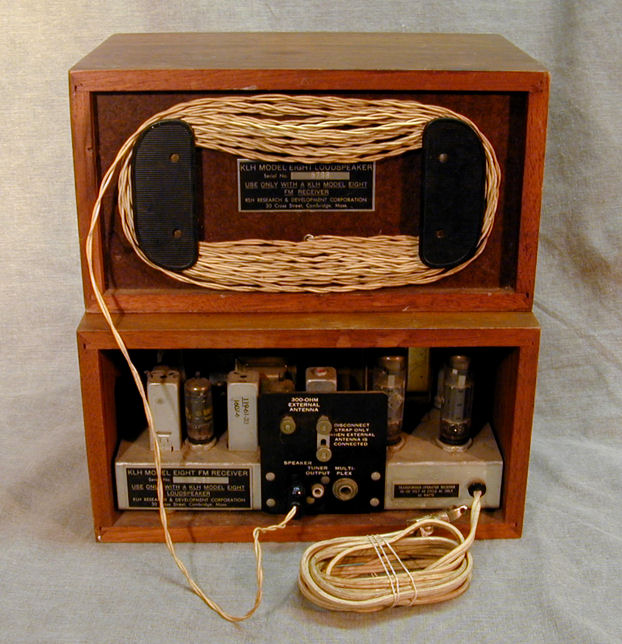
The rear view shows that the speaker has a back cover but the radio
does not. The two components are linked by a 30-foot long cable.
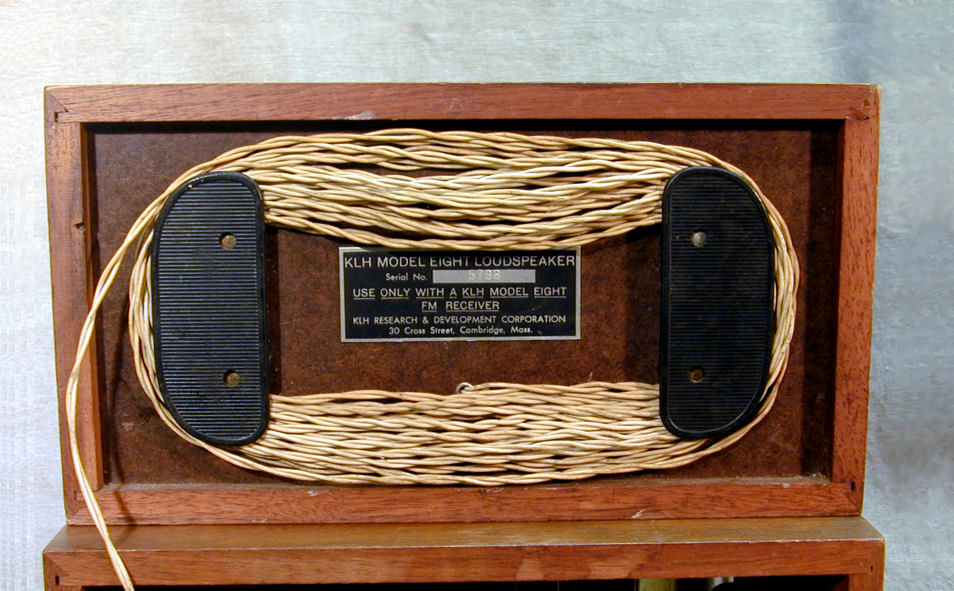
Big cleats on the speaker's back cover make it easy to stow excess cable:

Notice the wood grain and corner joints in the rear cabinet views. These early Model Eight
cabinets are made of solid walnut, while later cabinets are veneered wood.
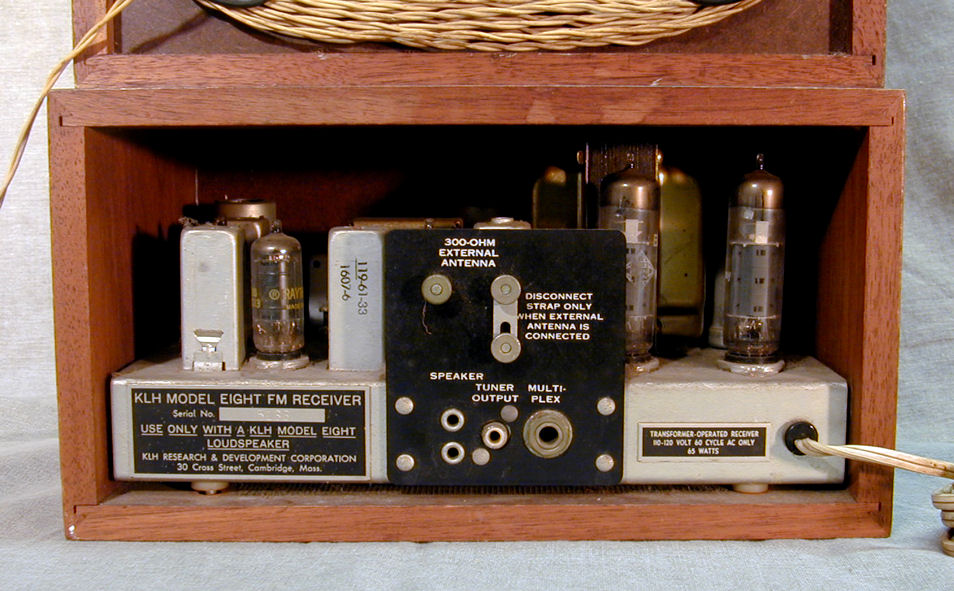
The radio's chassis is compact, with a few rear connectors:

Two upper terminals let you connect an external FM antenna. If an external antenna isn't available, you
can connect a strap between antenna terminals and employ the power cord as a
built-in antenna. At lower left are two jacks for the speaker
cable. The tuner output jack can be used with an external mono amplifier like my
Heathkit W-6M. The multiplex
jack is for use with an external stereo multiplex decoder and stereo
amplifier.
Trying Out the Model Eight
When I carefully powered up the unrestored radio using my metered
variac, it worked surprisingly well,
with good sensitivity, excellent tone, and no trace of hum (which would
signal bad filter capacitors).
The only defects were some scratchiness when turning the volume control and,
less often, the tuner. These can be cured with electronic cleaner when I take the
chassis out of the cabinet.
Cabinet Restoration
The cabinets are in decent shape, overall, but the speaker grille cloth has some serious stains.
Let's begin with the cabinet exterior.
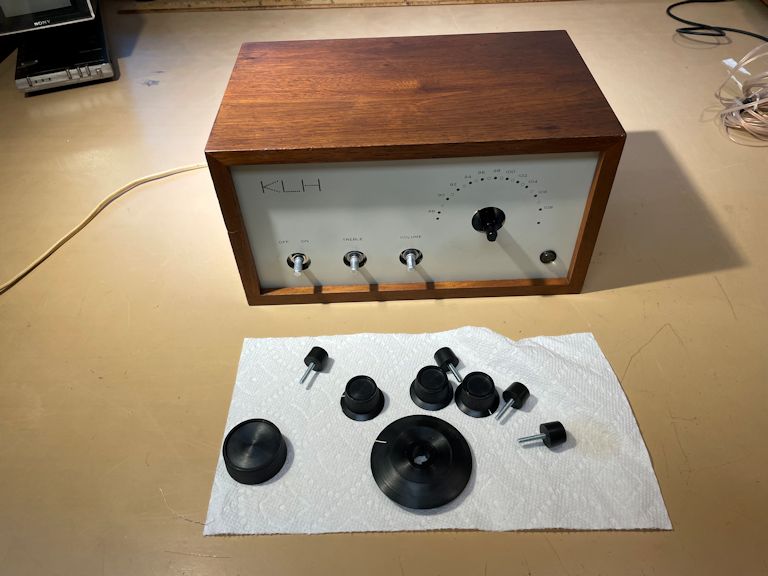
To remove the chassis, unscrew four feet from the cabinet bottom and pull off the knobs
from the front. Then the chassis slides out the back. The large tuning knob comes off
in two parts; use care when removing those, lest you break one.
After removing the chassis, I cleaned the front panel with Windex and a soft cloth.
This is a painted Masonite board. Don't scrub it with anything abrasive, lest you ruin the paint.

The walnut cabinets had scuffs and scrapes, which I concealed by wiping on some
Howard's "Restor-A-Finish."
Howard's can improve the appearance of a lightly-scuffed cabinet,
at least for a while. (I didn't realize at the time just how temporary the Howard's
product is, as we'll learn below.)
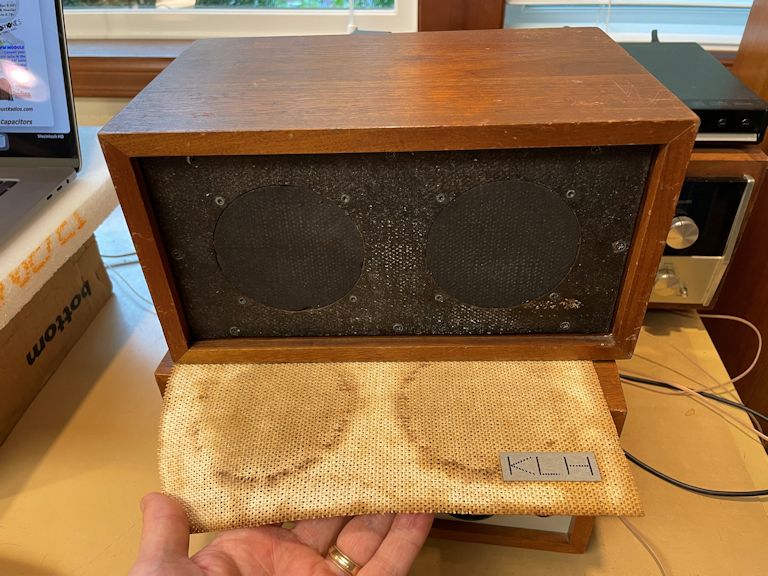
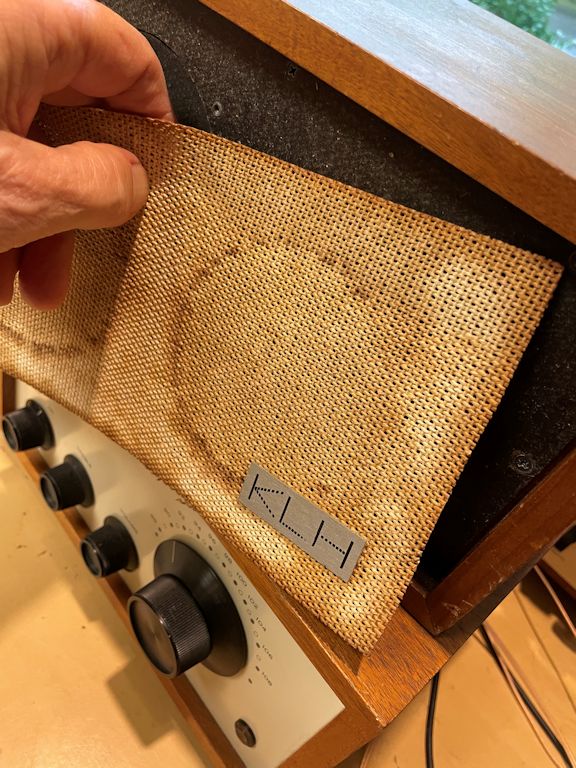
The speaker grille cloth needs serious help:
Much of the cloth is too dark—probably from decades of
exposure to tobacco smoke and cooking grease—and the lower part
has a stain caused by a splashed liquid.
The color is lighter over the two speaker holes.
Perhaps moving air kept dust from settling on those parts,
resulting in less staining.
In many old radios, the grille cloth is glued around the edges, so that,
with care, you can remove it for gentle washing. I successfully washed such a
cloth in my Admiral 24C15 TV project.
At first glance, this cloth seemed to be glued to the underlying speaker board,
so I didn't risk damage by trying to peel it off for washing.
(This assumption wasn't quite right, as I learned when revisiting
this project in 2022, described below.)
Nothing ventured, nothing gained! Without removing the cloth, I tried some
very mild cleaning methods. First, I dabbed the whole grille with clear water and a soft cloth,
pressing off excess moisture with a second cloth. The result, after the water
dried, was underwhelming. The overall color was a bit lighter, but
stains were still obvious.
The next day, I tried the same treatment, only using naptha lighter fluid, a
solvent that evaporates without leaving residue. After drying, the result
was about the same. Here's the cloth at this stage:

The cloth looks somewhat different, but it's not great. I'll set the
cabinet aside for now, and worry about the cloth later. If I can find
new cloth that's a good match, it may be simpler to just replace it.
Electronic Restoration
Although my Model Eight works in unrestored condition, I'll give it a routine
electronic restoration to cure the effects of age and ensure trouble-free
operation. The first phase in every restoration involves cleaning—both
electrical and mechanical. You can read more about these processes
in First Steps in Restoration.
Cleaning Up
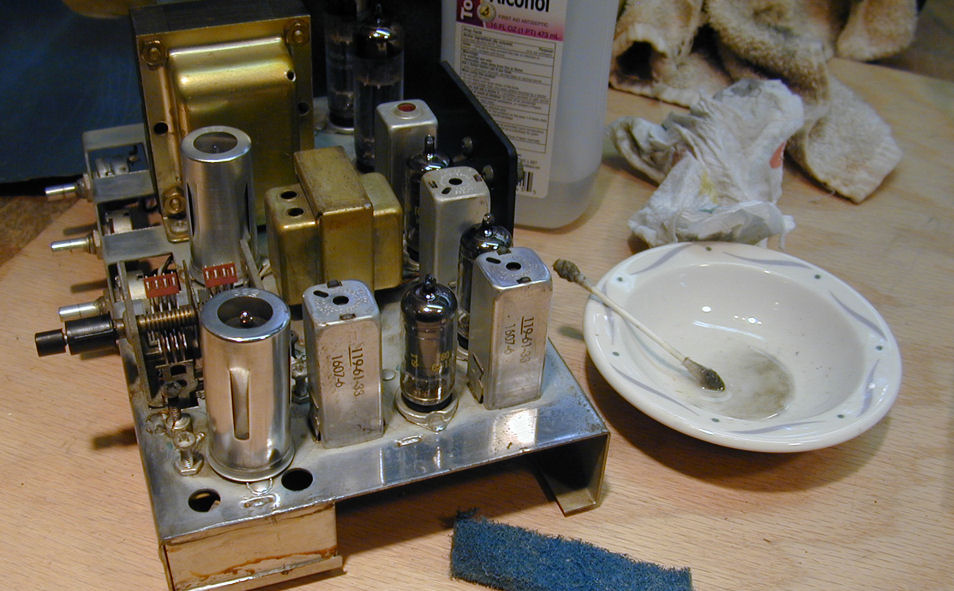
My Model Eight's chassis was covered with greasy dust, but not badly corroded.
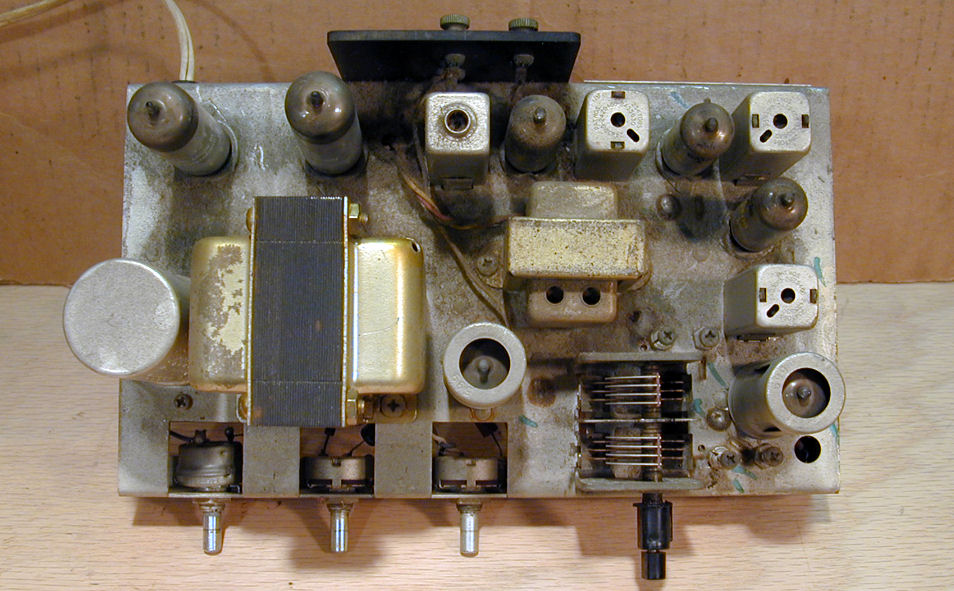
The view underneath was more inviting. No cleanup needed here.

The build quality of this hand-wired radio is admirable. The solder joints are very
neat and each one was tagged by a green marker, a quality control
measure to show that it passed inspection. The box at upper right in the
photo is the tuner cage, soldered shut to exclude dirt as well
as radio-frequency interference.
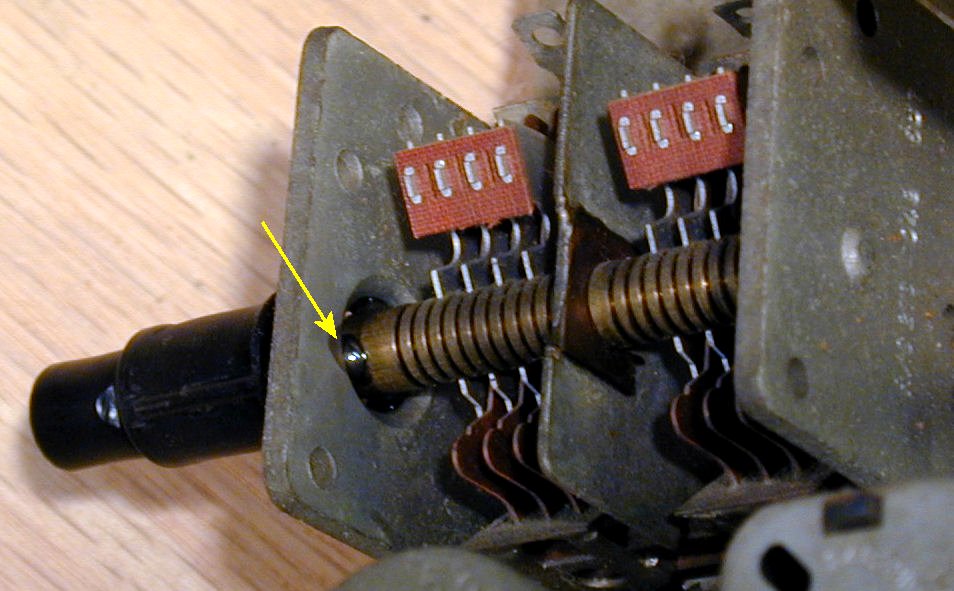
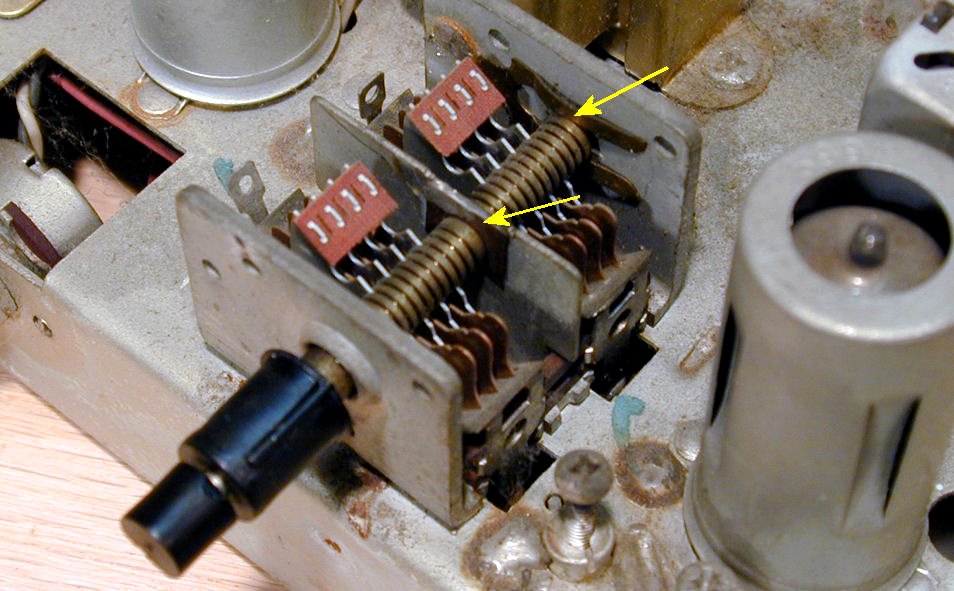
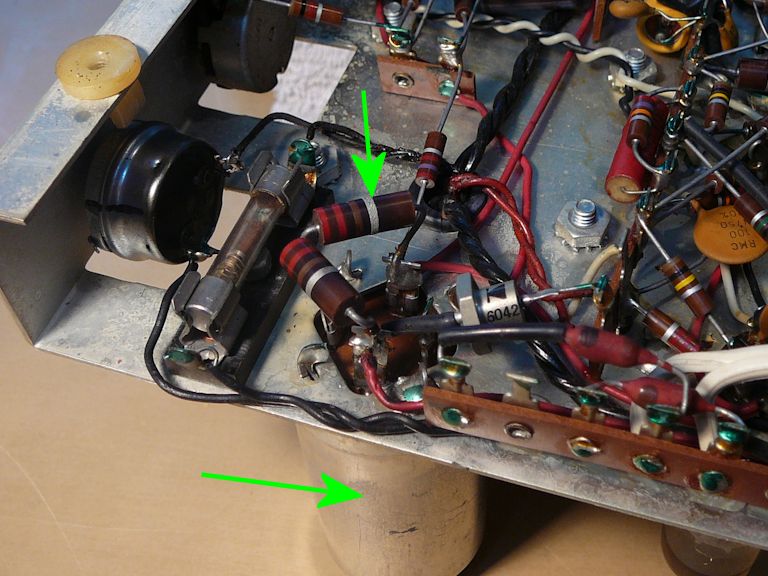
After dusting off the air variable capacitor, I lubricated it to
prevent binding. The yellow arrow
points to the ball bearing structure at the front of the tuner frame:
With the chassis tilted forward, I used a toothpick to put a drop of light oil into
the ball bearing mechanism, and rotated the tuner all the way back and forth
several times to spread the oil. I left the chassis tilted forward for a couple of hours
to let a little oil migrate down into the vernier tuning mechanism.
The arrows in the next photo show two more areas that got a wee bit
of CAIG electronic lubricant:

As in every restoration, I also cleaned every pin on each of the seven tubes,
as well as the tube sockets,
and applied electronic cleaner to the Treble and Volume potentiometers.
I let the radio sit overnight, to make sure all the electronic cleaner had
evaporated inside the potentiometers. When I tried the set the next morning, it sounded
fabulous! Simple cleaning eliminated all noisiness from the tuner and
controls.
Cleaning the chassis took longer. Its plating was oxidized as well as dirty.
I began by mopping off dirt and grime with isopropyl alcohol, using rags,
paper towels, and Q-tips. After that, I brought back the shine using
metal polish and pieces of non-scratch plastic pads. I cleaned off
the polish with damp paper towels and then polished with a cloth. This photo shows the
chassis after I had done a strip near one end.

The polished chassis looks more appealing:

Of course, the electrons whizzing inside the radio don't care whether
the chassis is dull or shiny. I don't bother with chassis polishing in many
projects, but the Model Eight is so nicely built that I like bringing it
closer to its original appearance.
2015 Update
When restoring tube radios older than this, I usually replace the electrolytic and
paper capacitors as a matter of course. (For more about capacitor replacement, see my
recapping article.) This 1960s set performed so well without
restoration that I took a wait-and-see approach. When I checked key voltages, everything
looked hunky-dory, so I decided to play the radio for a while.
Everything was fine for about four years, but in 2015, the radio's power switch failed.
While I had the chassis out to fix that, I also replaced the electrolytic and
paper capacitors.
Replacing the Power Switch
The power switch is a known weak point in the Model Eight and mine had been flaky for a while. Sometimes,
it would click into place normally. Other times, it refused to switch no matter how hard I turned the knob.
It eventually failed stuck in the Off position, so that I
couldn't turn the radio on and off by plugging and unplugging the cord (or
installing a line switch on the cord).
You'd think a simple rotary power switch would be easy to find, but this one was
not. Most consumer radios combine the power switch with the volume control, and other equipment
typically uses a toggle or rocker type switch. None of my usual suppliers stocked a plain
rotary switch of the right size.
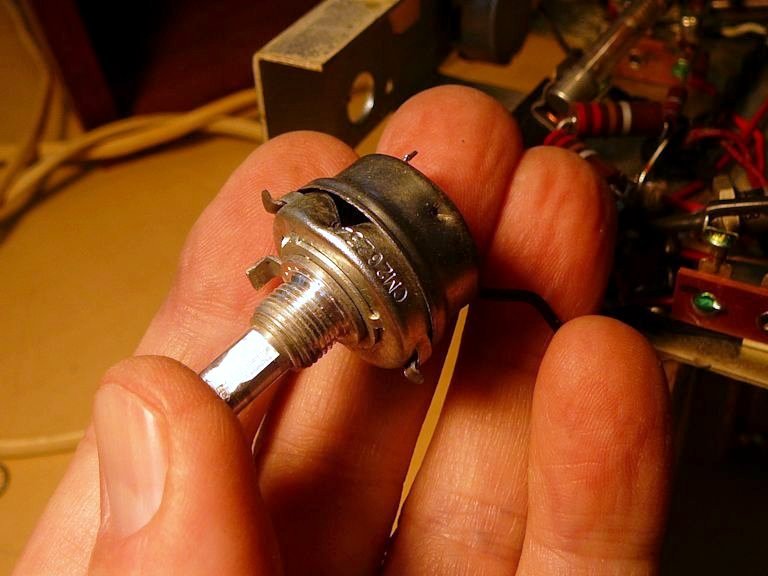
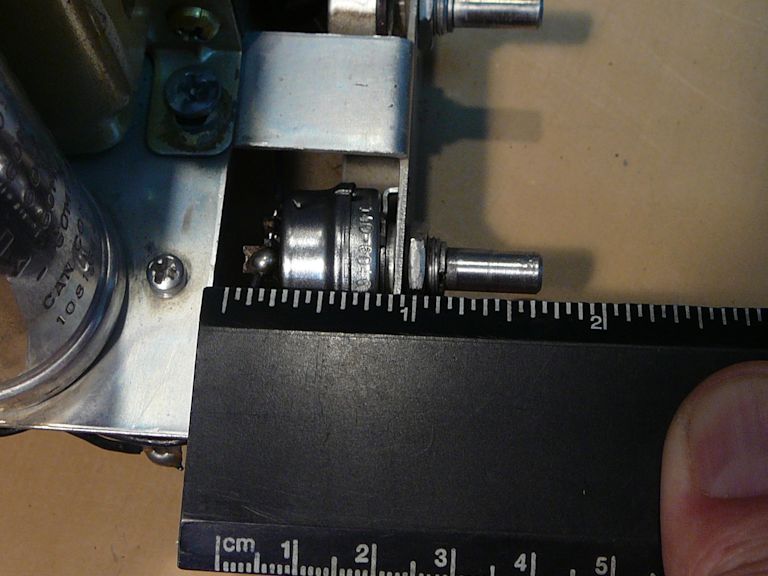
Below is the switch in question, made by Clarostat, with the part number 12 on its
back plate. Around the perimeter is another number, 140-6046; the 60 means it was
manufactured in 1960, and the 46 stands for the 46th week. (Yet another code, CM 26254,
was of no use in finding a replacement.)

The photo shows that a previous "repairman" tried to
open the switch by prying apart its case with an awl or screwdriver. That bent the case
but didn't open it, since it's held in place by two thin tabs bent over slots. You can
see a dent in the lower half of the case, perhaps from gripping it in a vise or heavy
plier. The flat portion of the shaft has also
been rounded off, when someone tried again and again to force the switch to operate.
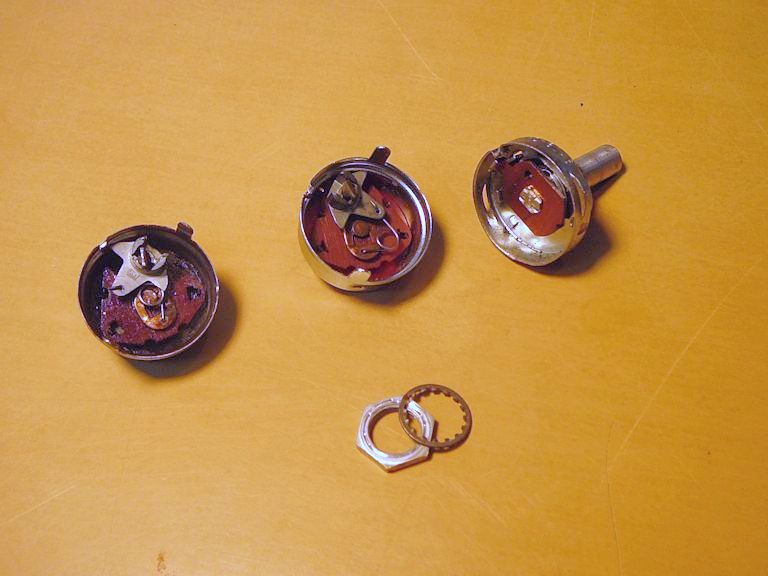
On eBay I found a replacement for the lower half of the switch (part 12), which contains the
actuated portion that makes and breaks the electrical contact. Here's a photo of the
old and new parts, along with the upper half that holds the knob shaft.

When I assembled the switch with the new half, it seemed to work outside the chassis, but
every time I installed it in the chassis, it quit working. The actuated mechanism refused
to click into place, no matter how hard you turned the shaft. After disassembling, checking, and
reinstalling the switch a couple of times, I finally gave up on it. The flaw—whatever
it was— seemed to be in the bent-up shaft portion of the switch, and for that I had no replacement.
Another option would be to use a volume control that combines a power switch with a potentiometer.
I could use the switch portion and leave the potentiometer terminals connected to nothing.
The trick would be to find one that fits the available space. Most power/volume controls have two sections stacked
one behind the other, and as you can see here, the original switch is about the same depth as a potentiometer alone:

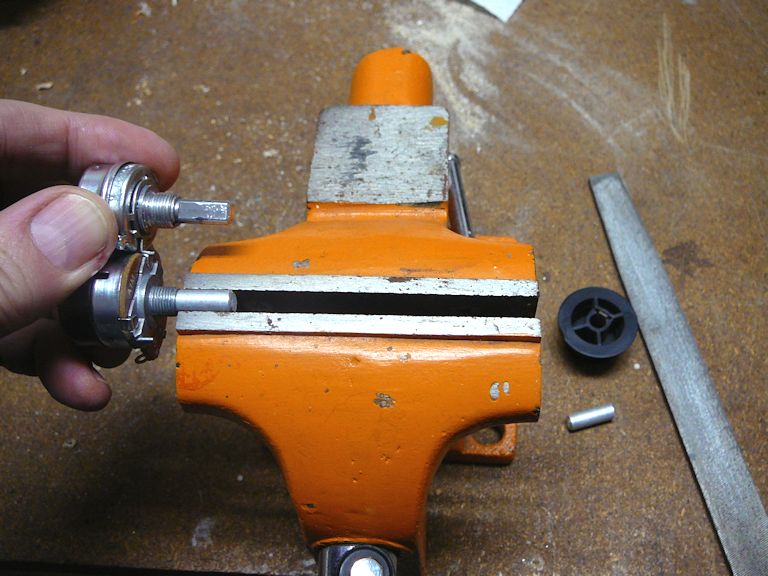
I rummaged in the pot drawer of my parts chest and found a volume/power control that would
fit. In the next photo, I have cut the control shaft to length and I'm ready to file a flat spot
on the shaft for the knob:

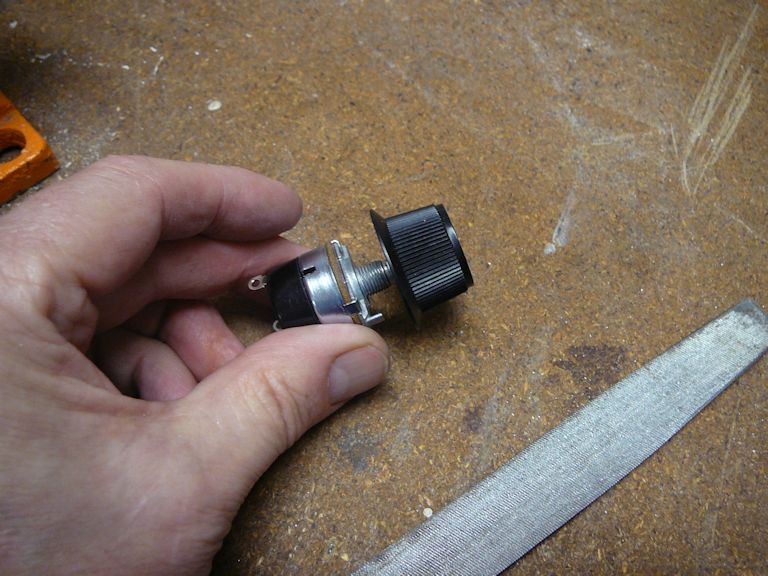
After some careful filing, the knob fit just right. In this photo you can see the control's two
sections. The pot section is cased in metal and the switch is cased in black plastic at the rear.

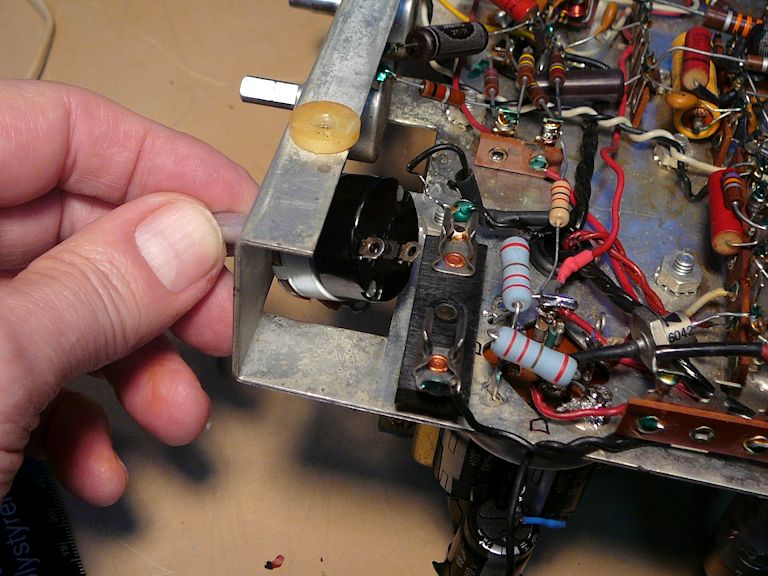
In the next photo, I'm slipping the new switch into place. It barely fits, if you
first remove a screw from the fuse holder and slide that aside temporarily.

Unseen on the opposite side of the control are the three potentiometer terminals,
which will remain harmlessly disconnected.
Replacing Electrolytic Capacitors
While testing the switch under power, I noticed that a 2-watt resistor connected to one of
the power supply filter capacitors overheated and showed signs of burning. In the next photo, that resistor is marked
with an arrow; a second arrow points to the can that contains four 60-mfd electrolytic capacitors
that filter AC ripple out of the power supply:

I disconnected those resistors and checked the electrolytics with my EICO 950B capacitor
tester. They leaked! One of them had nearly short-circuited. No wonder that resistor had overheated.
I knew I was pushing my luck by playing this radio with its original 53-year old electrolytics.
It's a lucky coincidence that I detected the problem before one of them failed catastrophically and
ruined the radio's power transformer.
Other articles in this website explain capacitor replacement in detail, so I won't
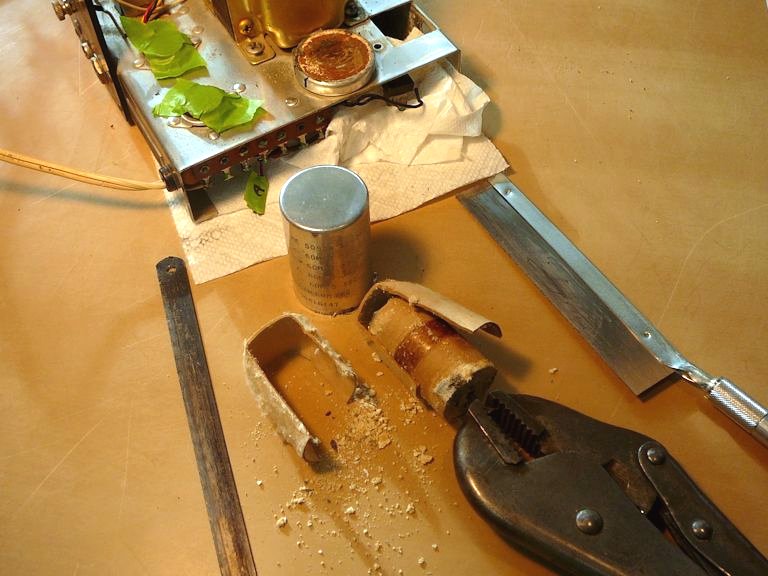
repeat all that info here. I removed the electrolytic can in preparation for wiring four 60-mfd electrolytics onto its base.
The next photo shows the dried-out innards that I pulled out of the old can. Notice the crumbly powdered junk
on the workbench. When this capacitor was manufactured 53 years ago, that powder was a moist paste that formed
the capacitor's electrolyte. Now it is garbage, an unmistakable sign that the capacitor has failed.
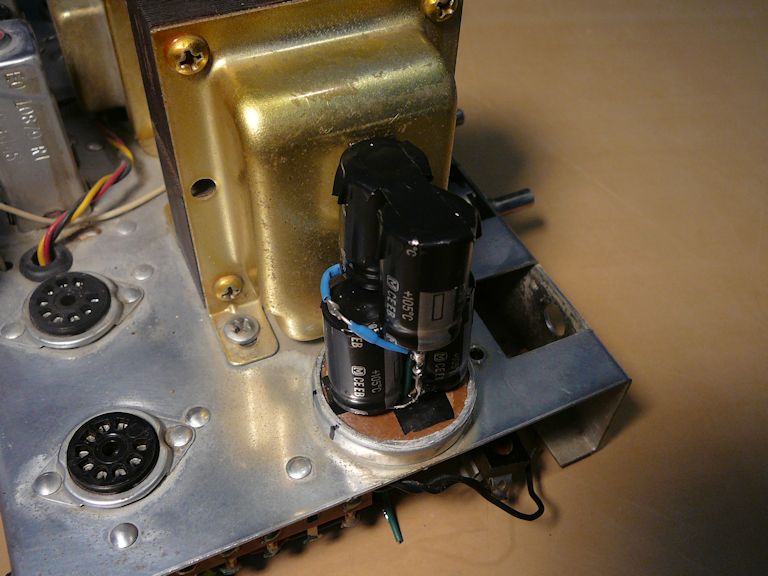
The next photo shows the four new electrolytics stacked and wired with their leads going through
holes in the can's base. After I confirm that the radio works normally, I'll glue the emptied can back over this assembly.

While I had the chassis on the bench, I also replaced its one other electrolytic, a 5-mfd/25-volt unit.
Better safe than sorry!
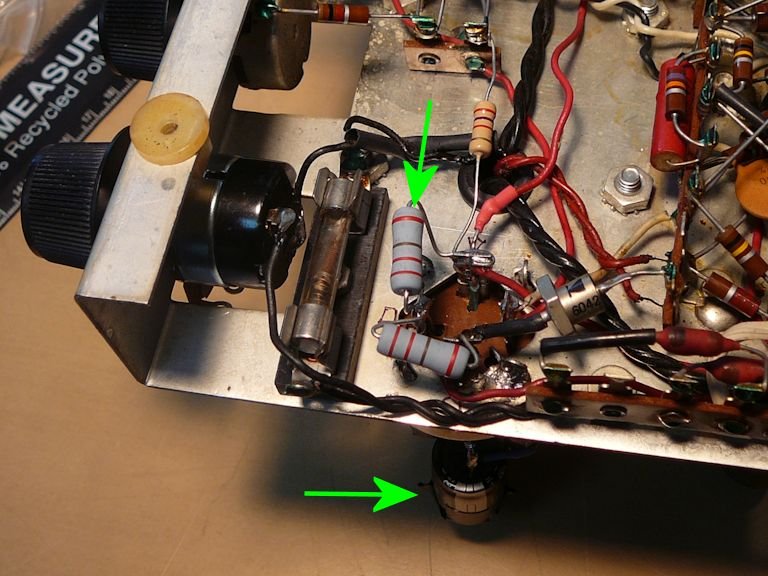
This photo shows the radio with the new power switch, resistors, and electrolytics wired in place.
One arrow points to a new resistor and another points to the capacitor assembly, ready for the
can to be reinstalled.

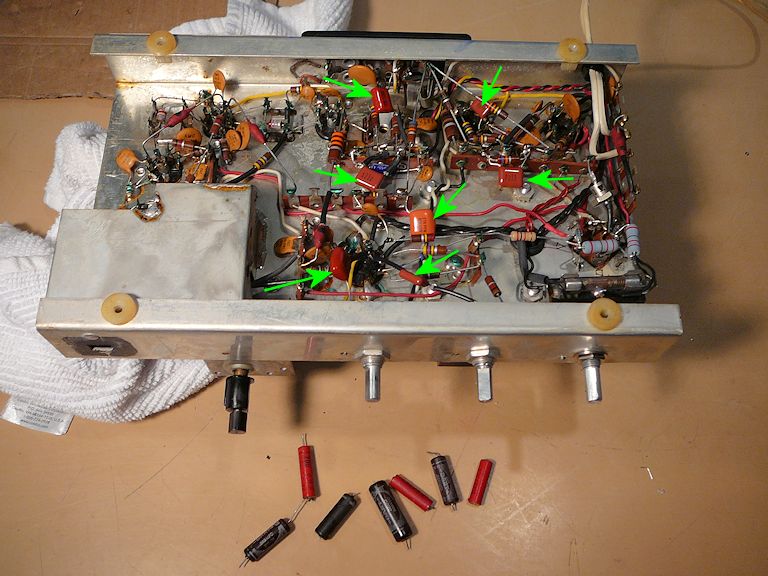
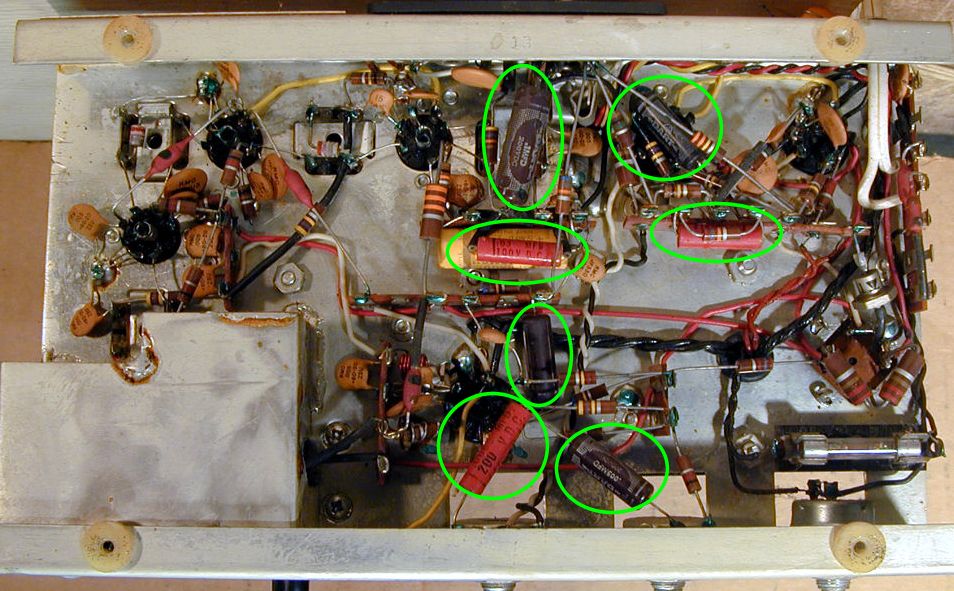
Replacing Paper Capacitors
The Model Eight has seven paper capacitors. Although they have plastic outer shells,
these caps use paper inside as a dielectric material, so they become leaky with age,
exactly like paper caps in cardboard cases. I'll replace them to prevent future
problems.
These photos show the paper caps before and after replacement:

I returned the Model Eight to its place of honor in my office,
where I played it often.
2022 Update
Fast-forward to 2022, seven years later. The radio's electronics still worked
flawlessly, but its cosmetics were going downhill.
The Howard's "Restor-A-Finish" had only made a temporary improvement
in the wooden cabinets.
I guess the volatile ingredients in Howard's simply evaporated over
time. In any case, now the wood looked just as weathered as when I got the radio.
And the stained grille cloth seemed to get uglier with every passing year!

Weirdly, while the circles over the speaker openings originally looked
lighter than the surrounding cloth, now—following my gentle cleaning
attempts several years earlier—they looked darker.
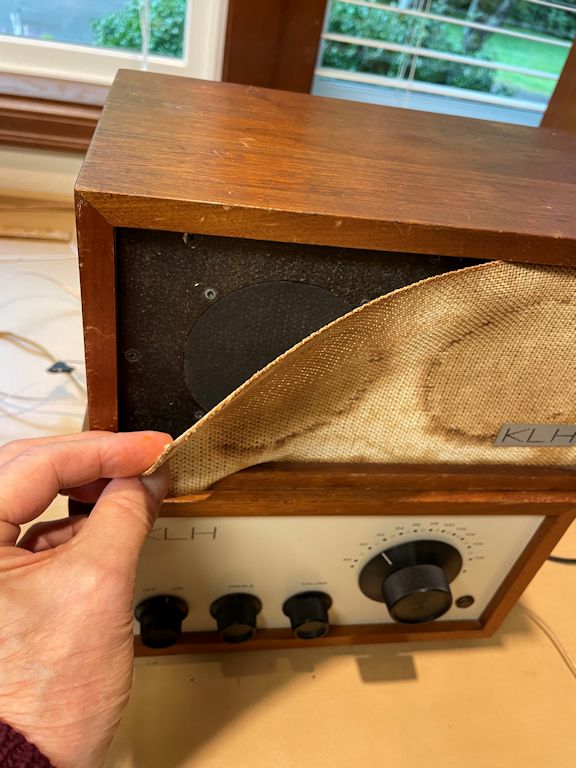
Replacing the Grille Cloth
In an online forum, I learned that the Model Eight grille cloth is not glued
onto its backing, as I had originally guessed. Instead, the fabric fits into slots
around the cabinet edge, and the stiffness of the cloth keeps it from
bellying out or coming loose.
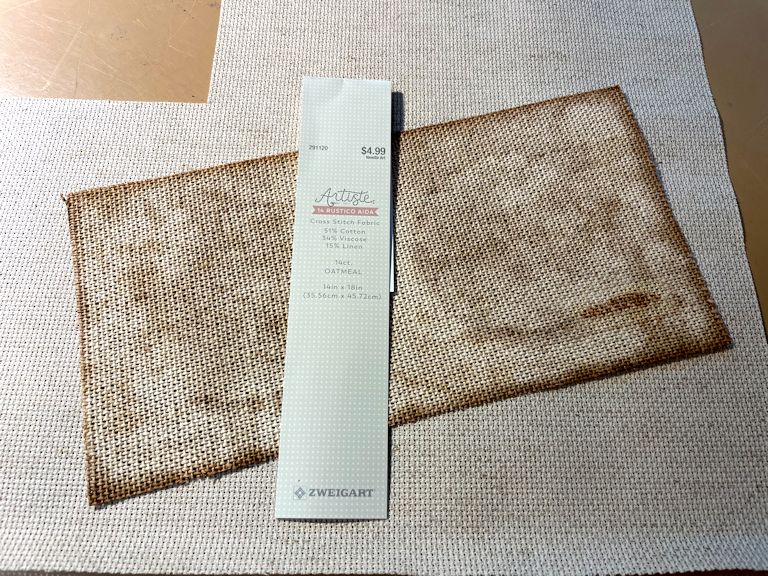
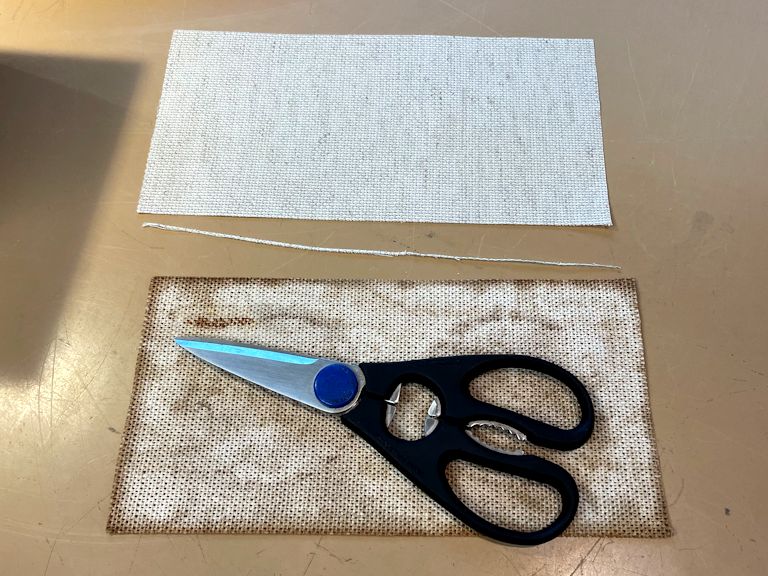
I also heard of a cross-stitch fabric (Rustica Aida 14-count, oatmeal color)
that's a close match to the original material.
Armed with that knowledge, I bought a swatch of the new fabric and removed
the old grille cloth. The cloth came off easily, except in a small
spot where smidgens of glue from the metal KLH emblem were pressed through the cloth onto
the backing board; gentle pulling freed that corner.
After removing the old cloth, I tried washing it again, with water and mild detergent,
in the name of science. If I could remove all the staining, perhaps I could re-stretch
the original cloth and use it. Unfortunately, washing simply didn't work.


Maybe there's some power on Earth that will remove all the stains, but I'm out
of patience. Let's cut a piece of the new fabric and see how it looks installed.

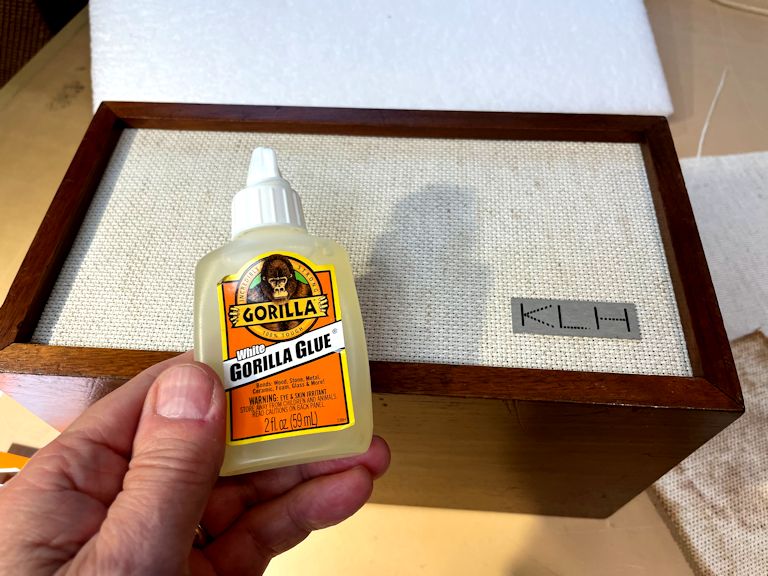
The new fabric is thinner than the original, so I applied some spray-on
starch, let it dry, and pressed it overnight under weights to make it perfectly flat.
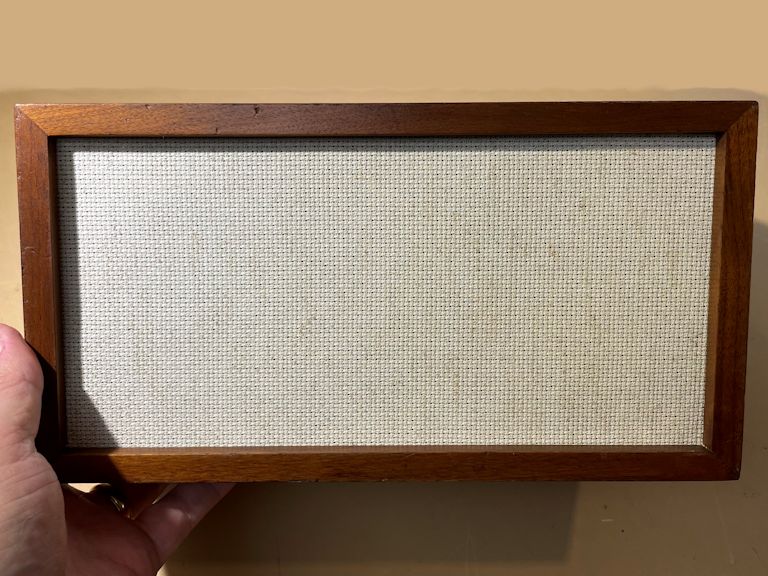
The next day, I cut a piece to fit and slipped it into the slots around the cabinet edge.


Nice! After gluing the metal KLH tag in place, our grille replacement is finished
If you shop for a replacement cloth, know that Aida is a special
fabric designed for cross-stitching and available from many
sources. Aida's open weave makes it "acoustically transparent,"
suitable for a speaker grille. Aida cloth comes in
different thread counts, with higher counts producing a tighter weave.
Various colors are also available, so if you're in a perfectionist mood,
shop around for the color and thread count that suits your taste. Perhaps
there's a flavor of Aida cloth that matches the original even better.
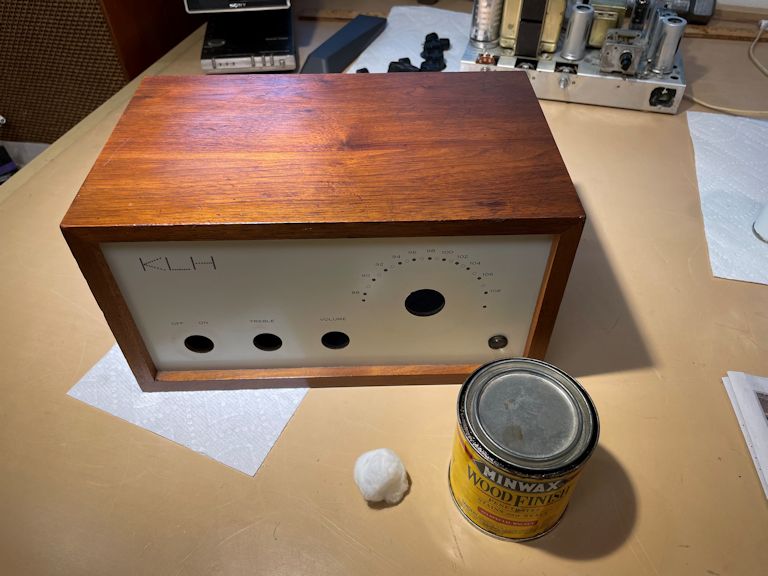
Refinishing the Cabinets
Refinishing the cabinets was simple. First, I applied a coat of Minwax 224 Special Walnut
stain, to conceal the scuffs and scratches that re-emerged when the Howard's finish evaporated.
I let the stain set up for a few hours, and then briskly buffed off the excess.
I set the cabinets aside to let the stain cure overnight.

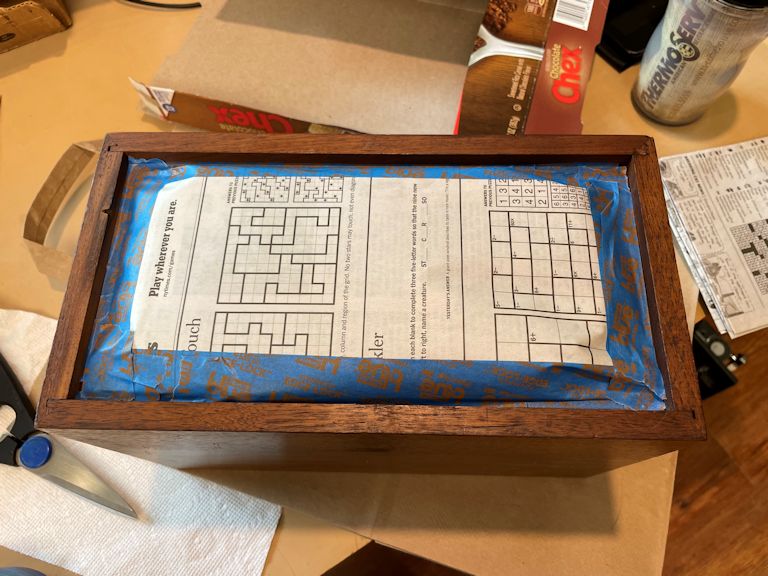
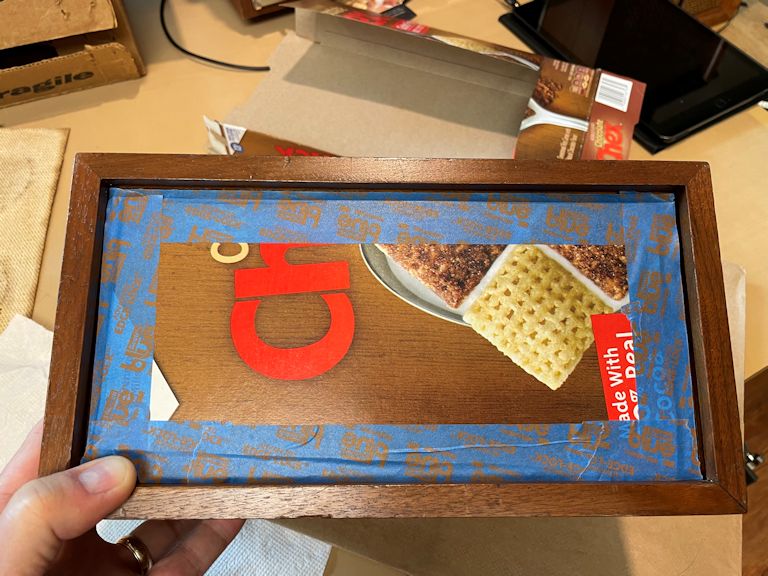
Next, I sprayed on a couple of coats of clear lacquer to permanently stabilize and protect the
new finish. I masked off the areas that we don't want to spray.


(In case you're wondering, it's complete coincidence that the cereal-box cardboard
I cut to make a mask pictured a wood grain nearly identical to the cabinets.
I didn't notice the correspondence until later, when processing photos for
this article.)
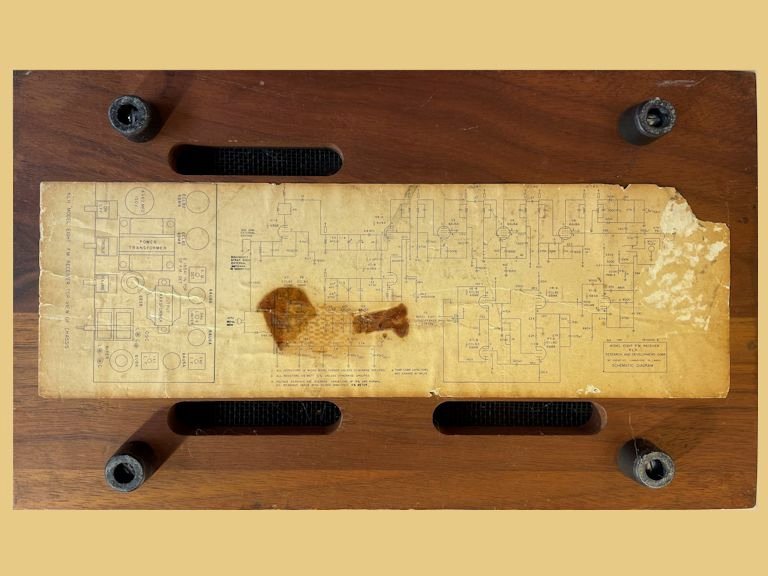
The Model Eight has a paper label on the bottom of the chassis cabinet.
This label repeats the schematic given earlier in this article, so if
you want to replace your label, simply print that schematic, sizing it to fit
the space.

After the lacquer has cured, it's time to reassemble the radio:

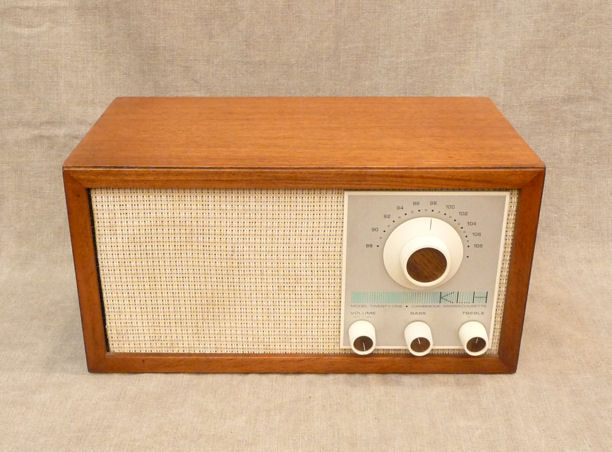
Bingo! With a new grille cloth and refinished cabinets, my Model Eight looks like better than ever:
(Incidentally, if you stack the speaker and chassis cabinets, it's better to put
the speaker on the bottom, not as shown in these photos. That allows better heat
dissipation from the chassis. I only stacked them this way to make a good photo.)
That concludes my Model Eight project for now. I honestly can't think of anything
else that it needs, so it should be a good long time before I return it to the shop.
Twenty One, Anyone?
I also own a KLH Model Twenty One:

The Twenty One is a solid-state set with speaker and radio combined in one
cabinet. It's easier to find (and often cheaper) than a Model Eight, but
both models exemplify Henry Kloss's dedication to quality.
|