Fisher Model 400 FM Stereo Receiver (1964)


If you're familiar with tube audio,
the name Fisher needs no introduction. Named after Avery Fisher,
its founder and guiding light, the company began in 1945 and produced some of
the world's best-performing and most elegantly designed high-fidelity
equipment during the 1950s and 1960s. The Model 400 FM receiver shown here
was manufactured from 1964 to 1968. Some tube enthusiasts rank
it as one of the finest FM receivers ever made.
I got this set in a trade. I had obtained a Fisher 500-C receiver some
months earlier, but it was missing its case and developed some
problems. When I got a chance to trade my non-working 500-C
for this working 400, I swapped without hesitation. Purists may
disagree on fine points, preferring one model over the other, but
to the average Joe, these receivers are basically equivalent. And I
wanted a good FM receiver for everyday use, so gaining a cabinet
was a distinct bonus.
Description
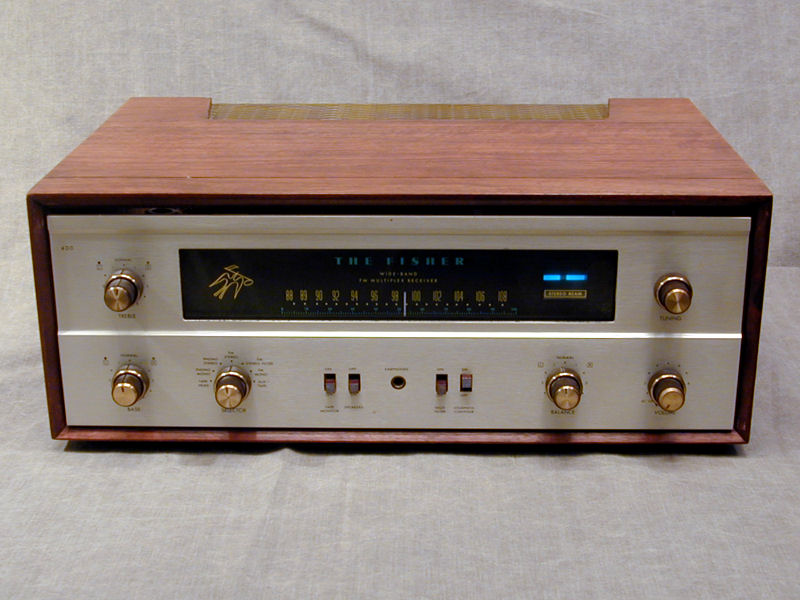
The 400 closely resembles the Fisher 500 and 800
series receivers, with a brushed metal faceplate and brass-faced
knobs. Left of the dial is the famous Fisher bird logo, with a musical note in its beak.
The walnut veneer cabinet has a gold metal grille at the back,
providing extra ventilation for the audio output tubes.
The front view shows the 400's straightforward
controls, with five round knobs for tuning, power/volume,
left-right balance, treble, and bass. A sixth knob selects among several
functions: tape aux, FM mono, FM stereo with filter, FM stereo, phono stereo,
phono mono, and tape head.
Slider switches control the tape monitor, speaker on/off,
high-frequency filter, and loudness contour circuits. A stereo headphone jack
is located between the two pairs of slider switches.
On the right side of the dial is a single "magic eye" tube that indicates
signal strength. Even though eye tubes have been largely superseded by LED
indicators, I think they're a lot of fun. You can read more about them, and
other radios of mine that use them, in my magic eye article.
In the rear view, you can see this set's many
input and output connectors.
The speaker terminal, near the center,
lets you select 4-ohm, 8-ohm, or 16-ohm speakers. A single jack
in the center lets you connect a monophonic "center channel"
speaker.
The antenna terminal appears to the left. Next to it are two
outlets for powering tape and phono equipment. To the right are six pairs
of jacks labeled tape head, phono low, phono high, record out, tape mon,
and aux tape. Directly above them, on the upper chassis surface, are
four more connectors (here, bridged with jumpers) for connecting a Fisher K-10
"Spacexpander" reverb system.
Also visible in the rear view are the receiver's four audio output tubes,
separated from the output transformers by a metal shield to direct heat outward.
The 400 uses all-glass Novar type 7868 tubes in a push-pull configuration.
The 500 and 800 series use 8-pin 7591 tubes. Both types are scarce and
expensive, running anywhere from about $20 to $50 or even more.
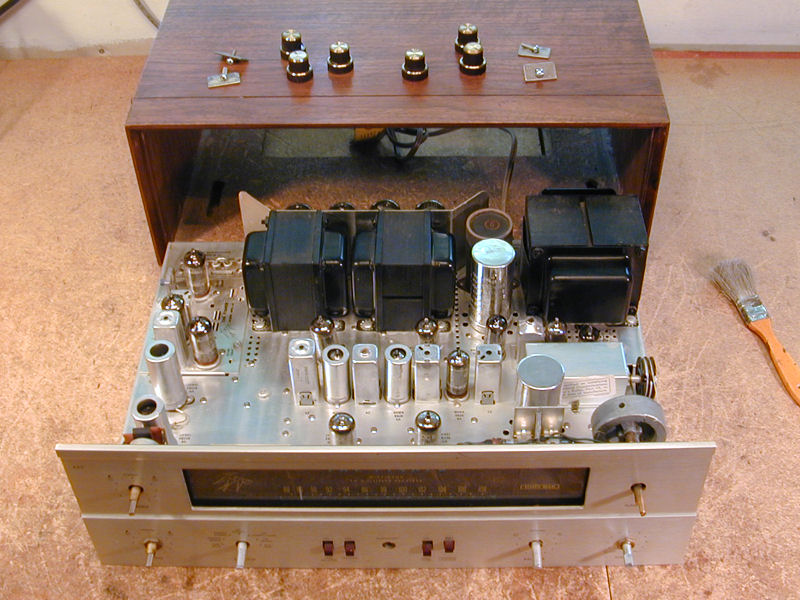
Removing the chassis for service is simple. Remove four screws from underneath
and slide the chassis forward. You needn't remove the knobs; I had just
taken them off for cleaning in this photo.
This view shows the hefty audio output transformers and the
power transformer. All of that "big iron" makes the 400
heavy. When lifting the chassis, most of the weight is in the back.
Be careful not to mash the plastic tuning pulley near the chassis
edge, right where you might be tempted to grip.
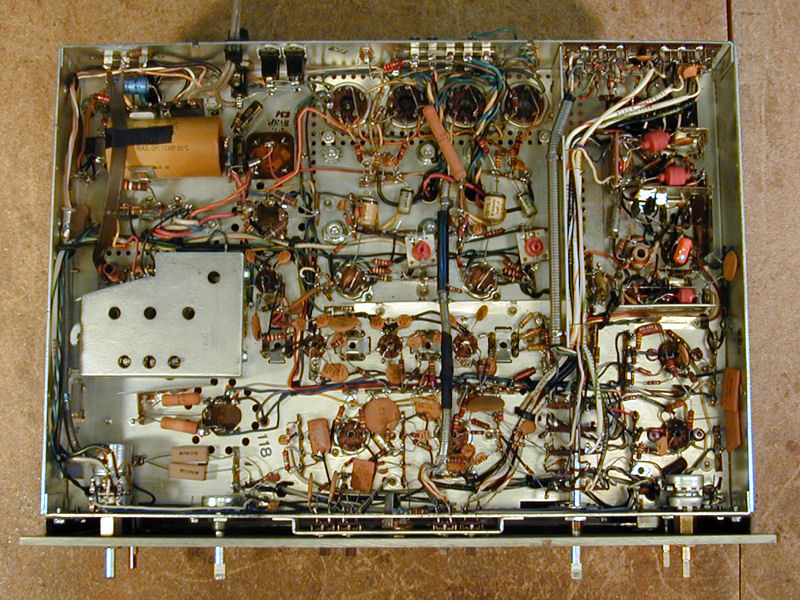
The under-chassis view shows the 400's complexity.
Servicing one of these—particularly, aligning
its FM tuner—is not a job for the novice. Mine appears
almost untouched. The only obvious change is that the old selenium
rectifier was updated with a more reliable silicon bridge rectifier.
As you may have read elsewhere in this website, selenium rectifiers are
unreliable and should be replaced.
Restoration
When acquired, this receiver only required some cleaning.
The cabinet was dull and very dirty, so I first cleaned it with
mineral spirits and a soft rag, to remove old grime and
furniture polish. Next, I applied walnut-colored Minwax to even
out the color. If you let the Minwax settle in for a couple of minutes, then
wipe off with a soft rag and buff it dry, it stains any small scratches to
the original color without changing the overall color of the piece.
The gold-colored metal ventilating grille at the back had a few small
spots of surface corrosion. It's not the kind of thing that you can
polish away, so I sprayed on a coat of gold paint that
matched the original color.
The chassis also showed ordinary dust and grime. After cleaning
it with Fantastik household cleaner, I shined the aluminum tube covers
and other prominent metal areas using Mother's Mag & Chrome Polish.
After removing and cleaning the faceplate and knobs,
I also pulled out the dual dial lamps for cleaning. These lamps
are quite unusual. Looking more like fuses than pilot lamps, they
are long and slender, with a metal connector at each end. One side of
each bulb is painted white, to
reflect more light onto the dial. The bulbs are mounted so that they shine
through the ends of the dial glass, as well as slightly onto the dial
backplate. The dial lettering seems to glow against a softly lit
background, a beautiful and sophisticated effect.
These receivers have a metal bottom plate, fastened with a few sheet metal
screws. Turning the set over and removing the plate, I was then able to
spray De-Oxit into the controls to clean and lubricate them.
The power-supply rectifier had already been replaced, so I didn't
do any electronic restoration at that time.
Safety Upgrade
After using my 400 for several years, I took out the chassis to
dust it off. Although it had been performing flawlessly, I decided to install
10-ohm "safety" resistors on the cathodes of the four output
tubes. This simple upgrade will protect the output section. While I
was in the neighborhood, I also replaced the four output coupling capacitors (C62, C63, C64, C65).
Although I routinely replace power-supply electrolytic capacitors in
my vintage radios and TVs, I make an exception for my Fisher receivers.
They both perform without a trace of hum or ripple, day in and day out, so
I have left the original electrolytics alone. Perhaps Fisher used
better quality electrolytics than you find in most consumer gear.
Some Fisher owners perform additional upgrades on these receivers.
In my Fisher 800 article, you can read
more about the "full Monte" upgrade.
A more detailed, 400-specific
discussion can also be found in the Antiqueradios forum archives. If you don't want to
collect the parts and schematic yourself, you can purchase a restoration
kit from Metalbone.
Final Thoughts
If you're looking for a fine-sounding tube receiver, the 400 is an excellent
choice. My 800-B has more features, but I doubt I could tell them apart in
a blindfold listening comparison.
At this writing, in June, 2012, my 400 has been performing beautifully for
more than a decade. While I had the chassis on the workbench, I made
a thorough test of all functions, and I couldn't find anything amiss, so I
buttoned it back up and returned it to service. With any luck, it should
perform just as nicely for years to come.
|