|

How to Ship Antique Radios Safely
To a collector, nothing is more disappointing than receiving
a broken radio in the mail. Packing the radio properly ensures
that your precious radio arrives safely. It can
also help prevent potentially angry situations
such as a buyer demanding a refund.
In my experience, double-boxing is the best packing method. I have
never had a radio damaged when securely packed in a double box—even
heavy "boatanchors" weighing close to 100 pounds.
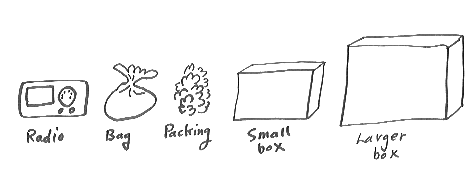
Here are the materials you'll need:
Except for the smallest transistor sets, it is not a good idea to pack more than one radio in the same box. The risk of breakage is not worth the slight savings in time or materials.
For larger tabletop radios, it may take some detective work to find suitable boxes. Try contacting local businesses that use items such as computers, photocopiers, or microwaves, which are shipped in big sturdy boxes. If all else fails, you can buy new boxes from a professional shipping company.
For large console (floor) radios, I do not recommend shipping in boxes at all. The risk of damage is too great.
I have hired Craters & Freighters to ship heavy consoles; there are other companies, too.
Here are the steps to follow:
1. Prepare the radio for shipment. Make sure that all removable parts such as knobs, back, etc., are present and secure. Coil the power cord around your hand and secure it with a rubber band or twist tie. In most cases, tubes do not need to be removed for shipment. If you happen to have loose tubes or other parts, they should be securely wrapped in bubble wrap; taping this little package to the coiled power cord will keep it from being lost in the mess when unpacking. Note: these general instructions apply to an average-size table radio that is in good condition. In some cases you will need to take further steps such as removing the chassis and speaker and shipping them in a separate box. This includes Catalin radios, whose cabinets are extremely brittle; heavy cathedral and tombstone radios; and any radio with loose parts or cabinet damage which makes the cabinet fragile.
2. Place the radio in a large plastic bag. A kitchen garbage bag is ideal. The bag keeps stray packing material from getting into the radio and it helps to protect the radio from abrasion during transit. Tape the bag securely around the radio.
3. For many table radios, you can proceed directly to the next step. Certain radios, however, have fragile features, such as a projecting dial pointer, that need special protection. Use ingenuity and common sense in devising the best way to protect these sets. In some cases, a few extra layers of strategically placed bubble wrap will fill out the radio's front surface and protect the protruding features. You can also cut holes in a sheet of rigid foam to fit knobs and buttons, or break small pieces of foam into the right shape to fit around them. When in doubt, it never hurts to add another layer of soft bubble wrap!
4. Line the bottom and sides of the small box with packing material, to provide padding between the bagged radio and the box. My favorite packing material is sheets of rigid styrofoam, available in hardware or building supply stores. The next choices, in order of preference, are sheets of plastic bubble wrap, styrofoam peanuts, or wadded newspaper. If you use bubble wrap, tape the sheets in place around the radio. If you must use styrofoam peanuts, put the peanuts in several small plastic grocery bags and tie the bags shut. The small bags make it easier to pack the peanuts securely and they drastically reduce the mess when unpacking on the other end.
5. Place the bagged radio upright in the box. Add packing material as needed to prevent the radio from slipping around during transit.
6. Add packing material above the radio. Use enough packing so that the radio fits securely and won't shift during transit. Don't cram the packing material so hard that you damage the radio.
7. Tape the small box shut. Shake it around a little, to see whether the radio shifts inside the box. If it does, open the box and add more packing material.
8. Line the bottom and sides of the large box with packing material.
9. Place the small box upright inside the large box. Add packing material as needed to prevent the small box from shifting around in the large box.
10. Add packing materials above the small box.
11. Before closing the large box, put in a sheet of paper giving the name and address of the recipient, as well as your own name, address, and phone number. If the address is accidentally torn off the outside of the box, the shipper can open the box and find out its destination.
12. Tape the large box shut, covering every edge of the flaps with tape. Write "Fragile" on each side of the box and the top. Draw arrows on each side of the box to show which surface should remain upright. Address the box. You're done packing!
It's a nice courtesy to send the shipment's tracking number to your recipient, so he or she knows when the item has been shipped and can track its progress.
|