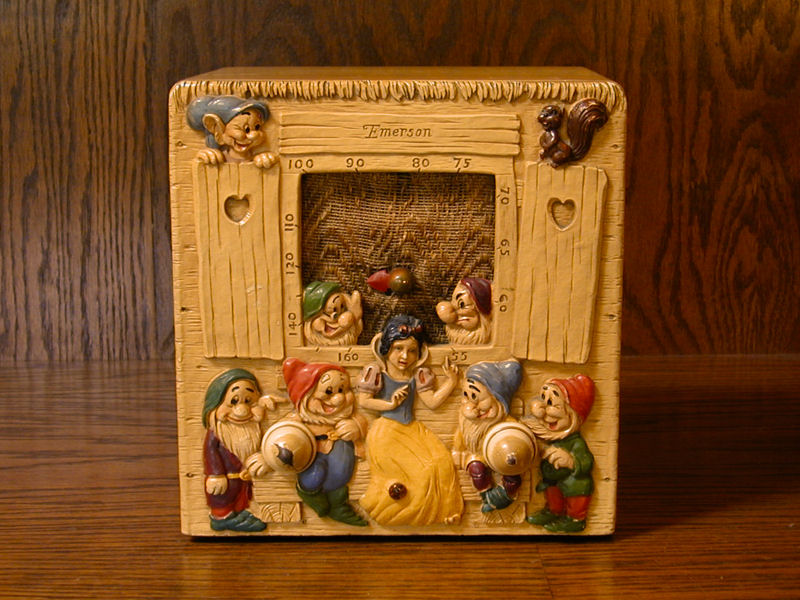
Emerson "Snow White" Model 247 Radio (1939)


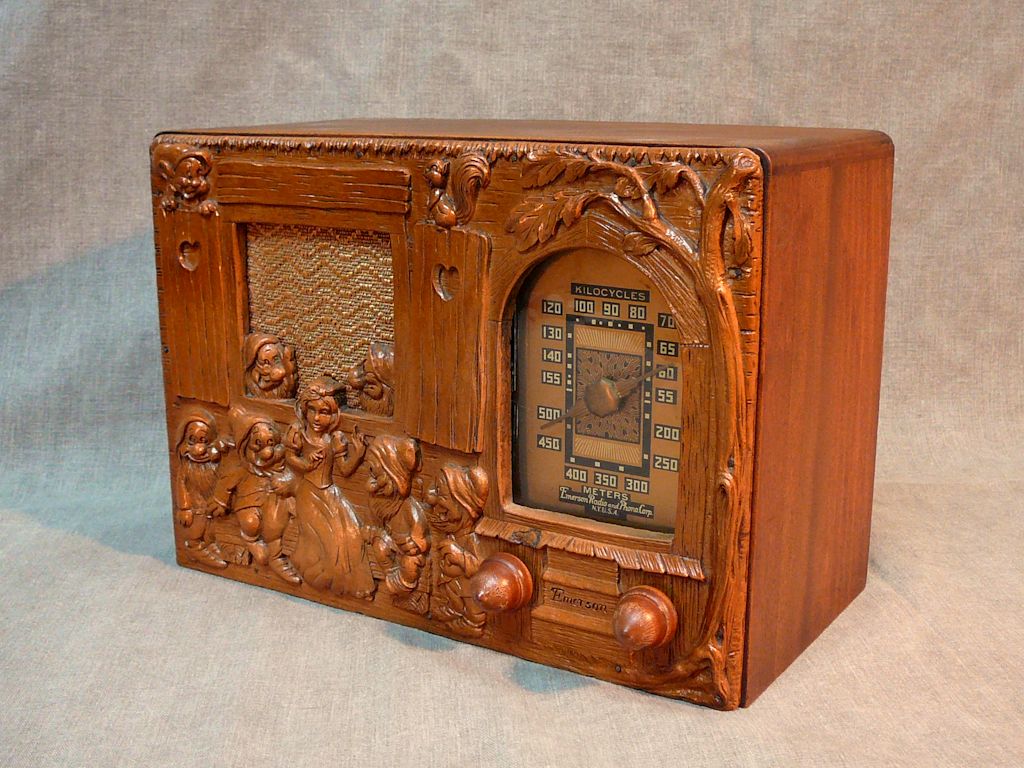
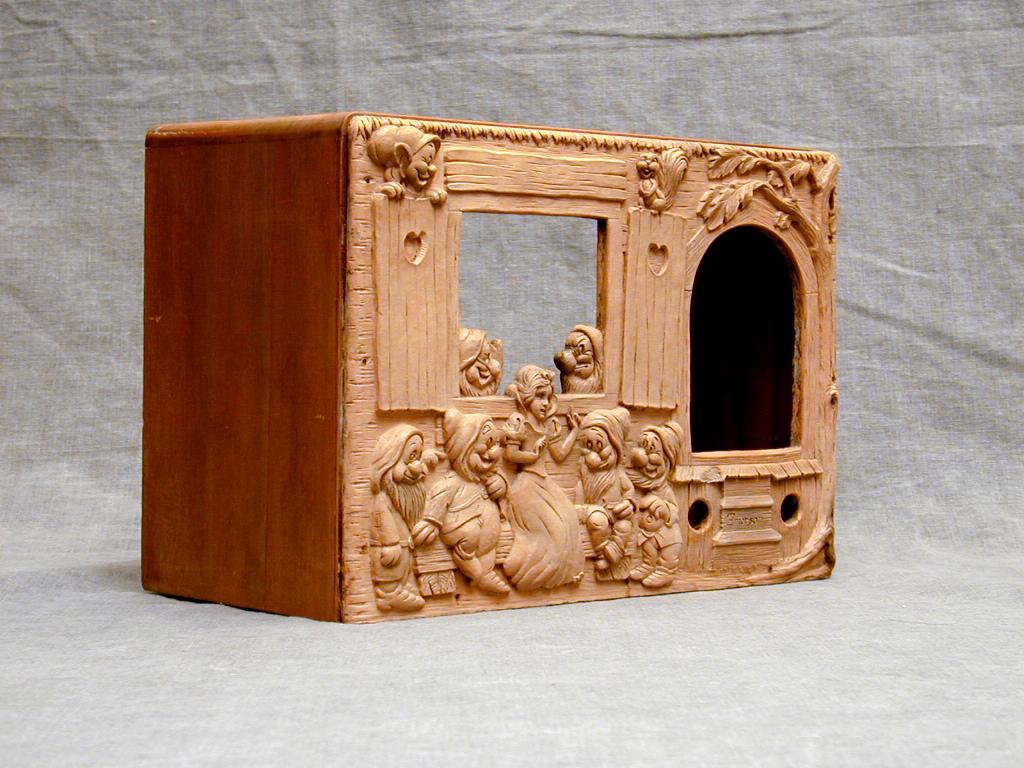
The Emerson "Snow White" Model 247 radio is a classic figural set, showing
Snow White and the Seven Dwarfs frolicking before their rustic cottage. Here is
my restored radio:
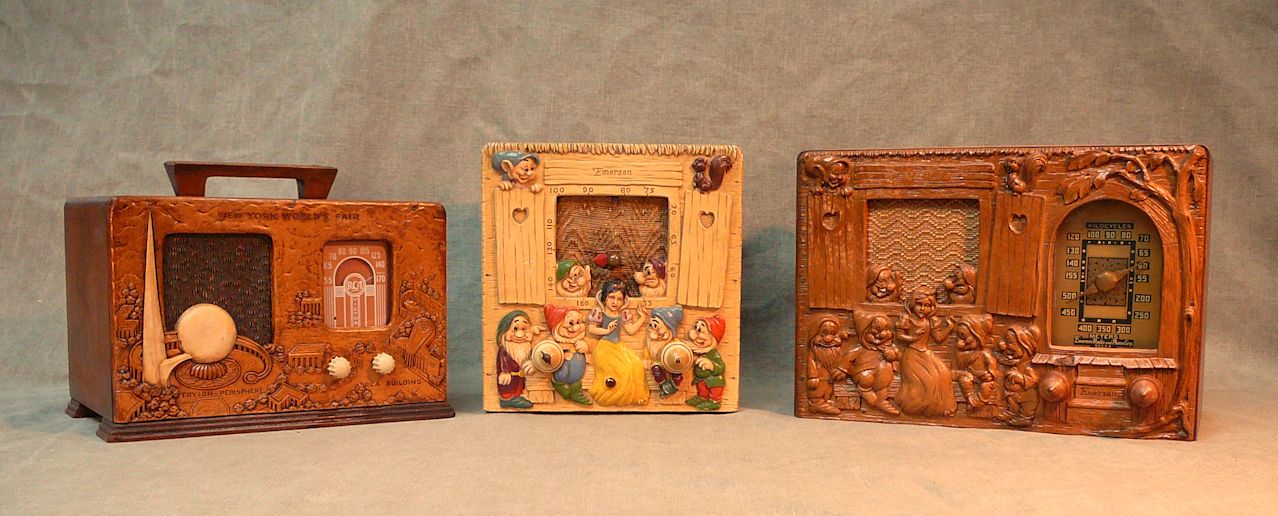
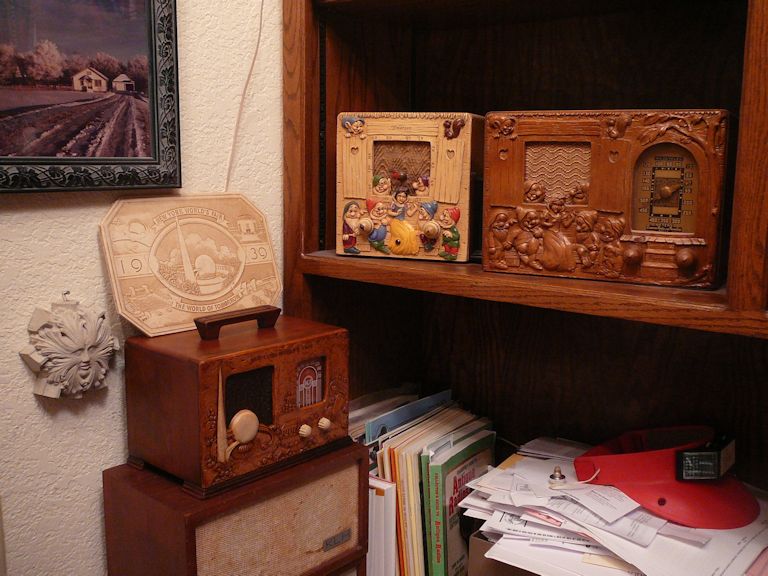
I own two other radios with figural panels of this type. The next photo shows all three.
In the center is another Snow White radio (Model Q236) with a painted panel;
we'll say more about that one later in this article. The radio on the left is an RCA
40X-56 that commemorates
the 1939 New York World's Fair.

Description
Premiering in 1937 at Radio City Music Hall in New York City,
Snow White and
the Seven Dwarfs was an instant hit and it remains one of Disney's most popular creations.
Under contract with Disney, Emerson produced two different versions of the Snow White
radio, as well as two Mickey Mouse sets. This radio dates from 1939.
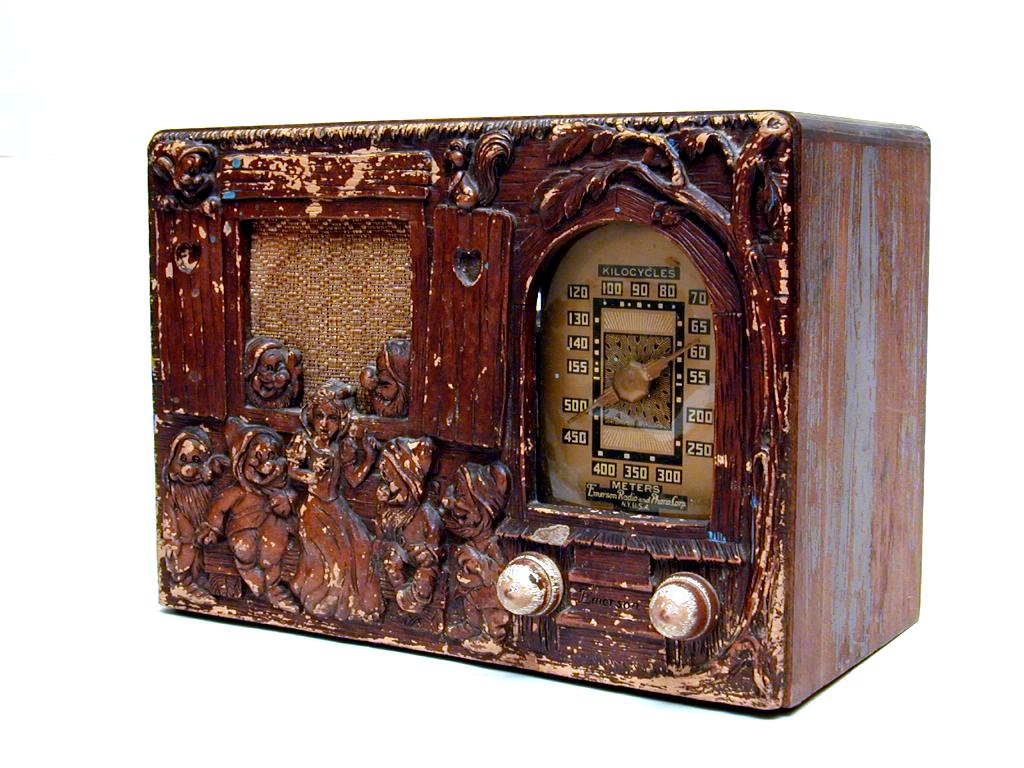
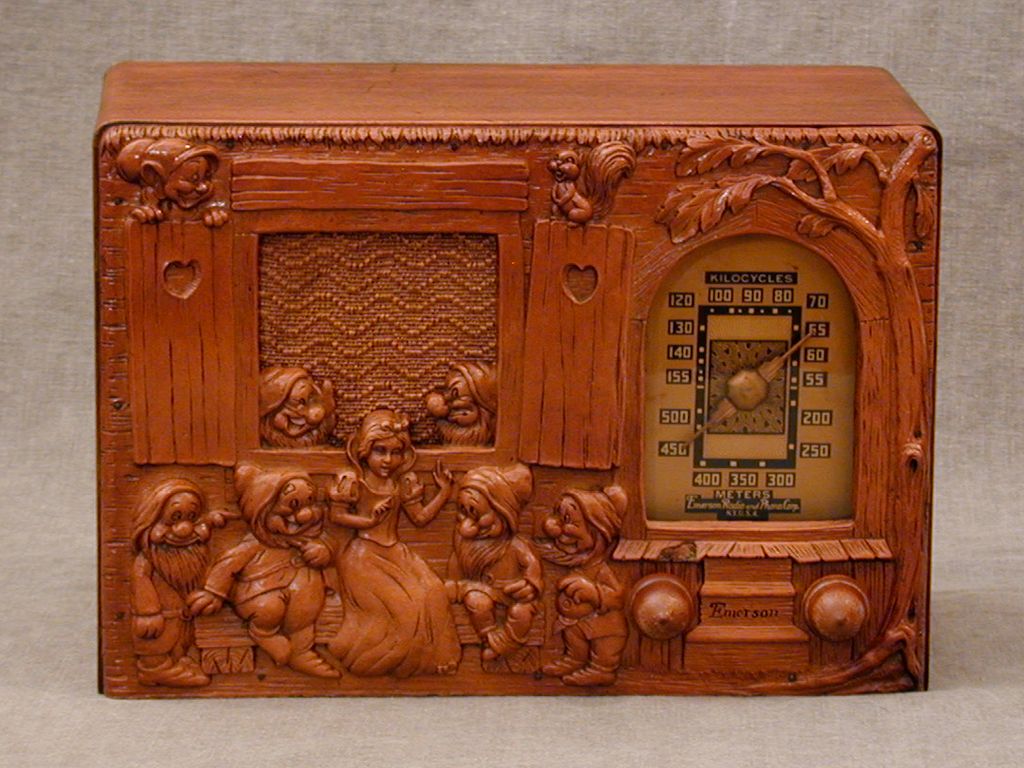
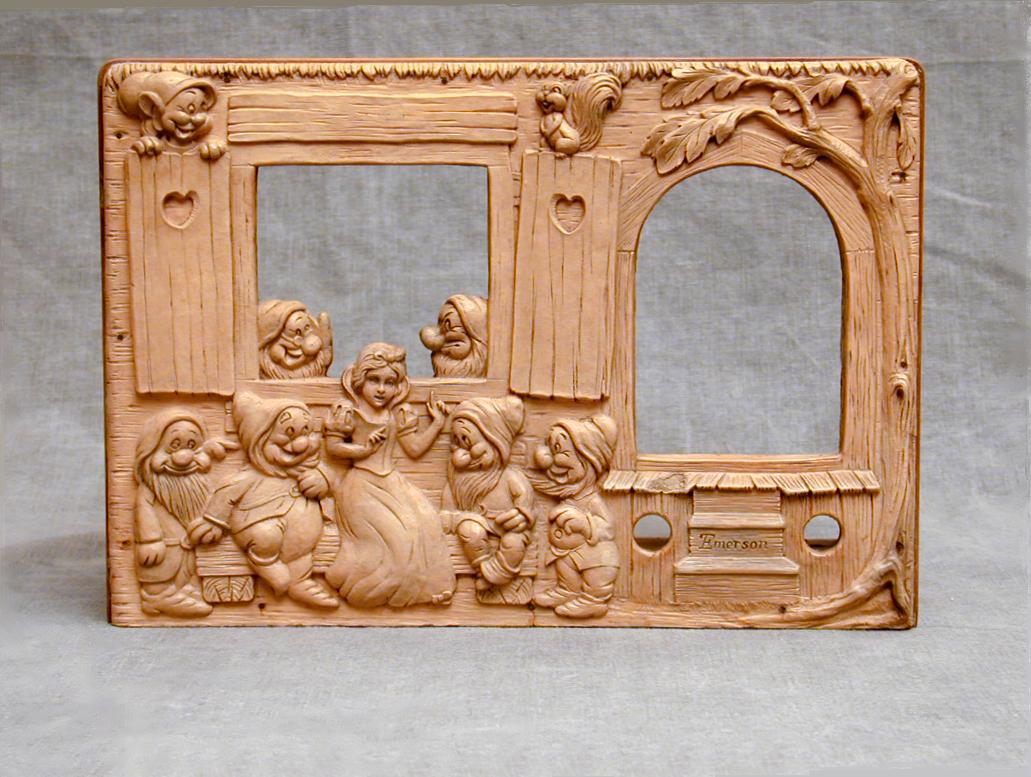
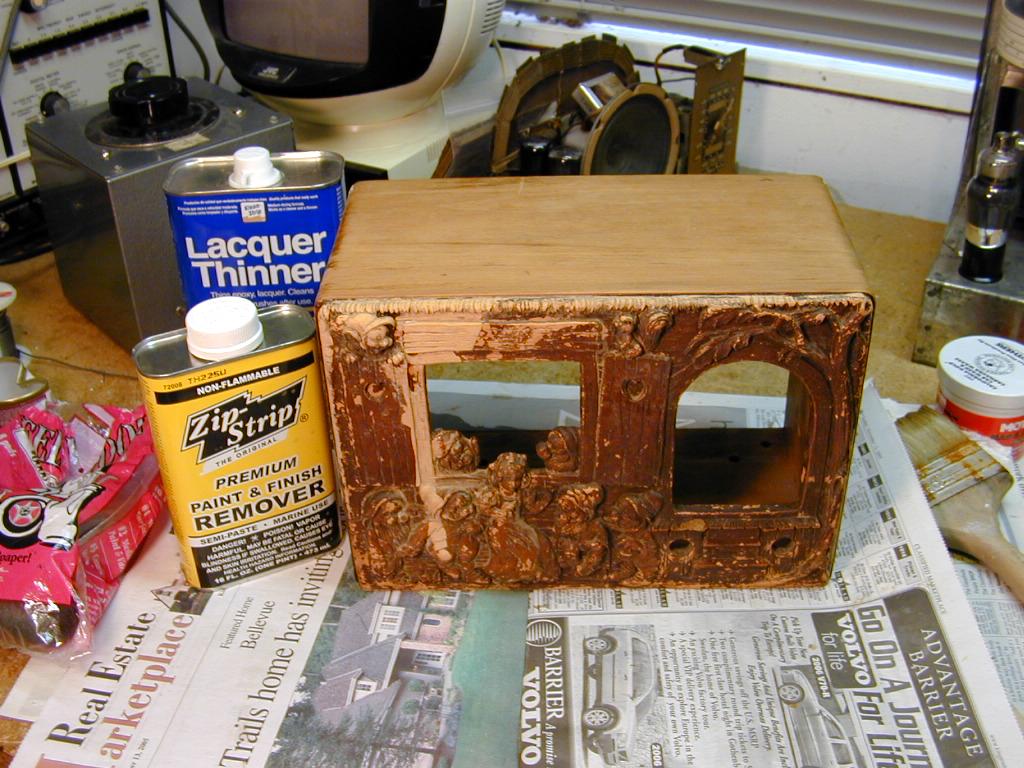
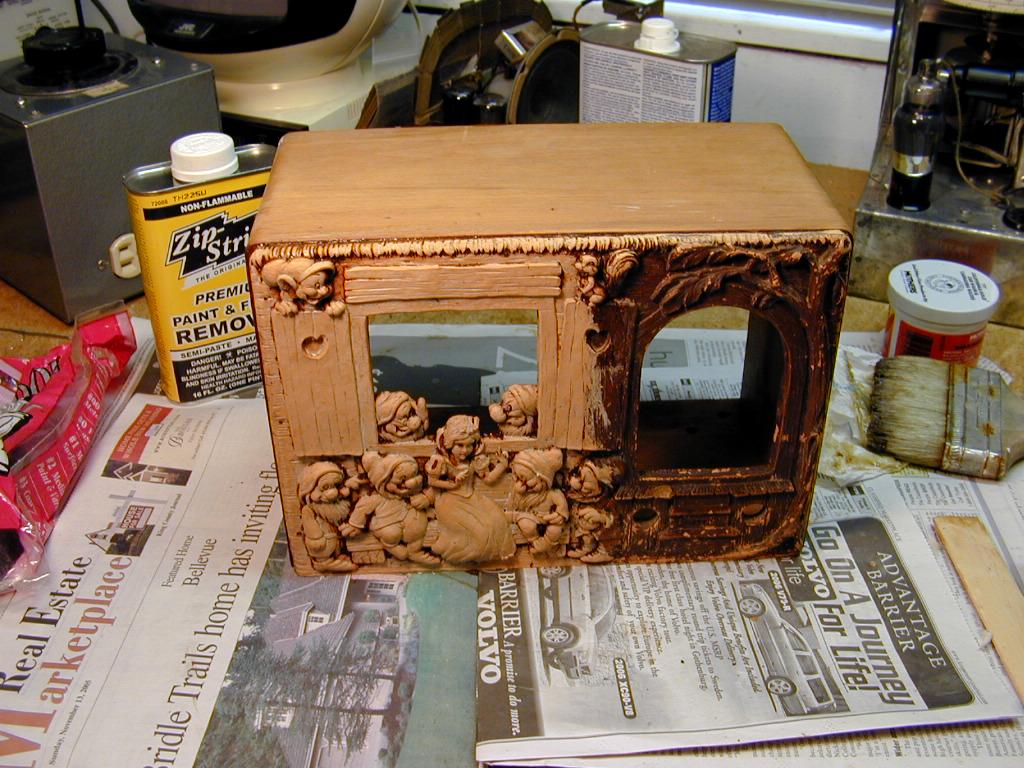
The first photo shows the radio's front before I restored it, and the second shows the
front panel after I removed the ruined old finish. Look closely to spot Dopey.
He's peeking over the window shutter at upper left, laughing at a squirrel to the right.
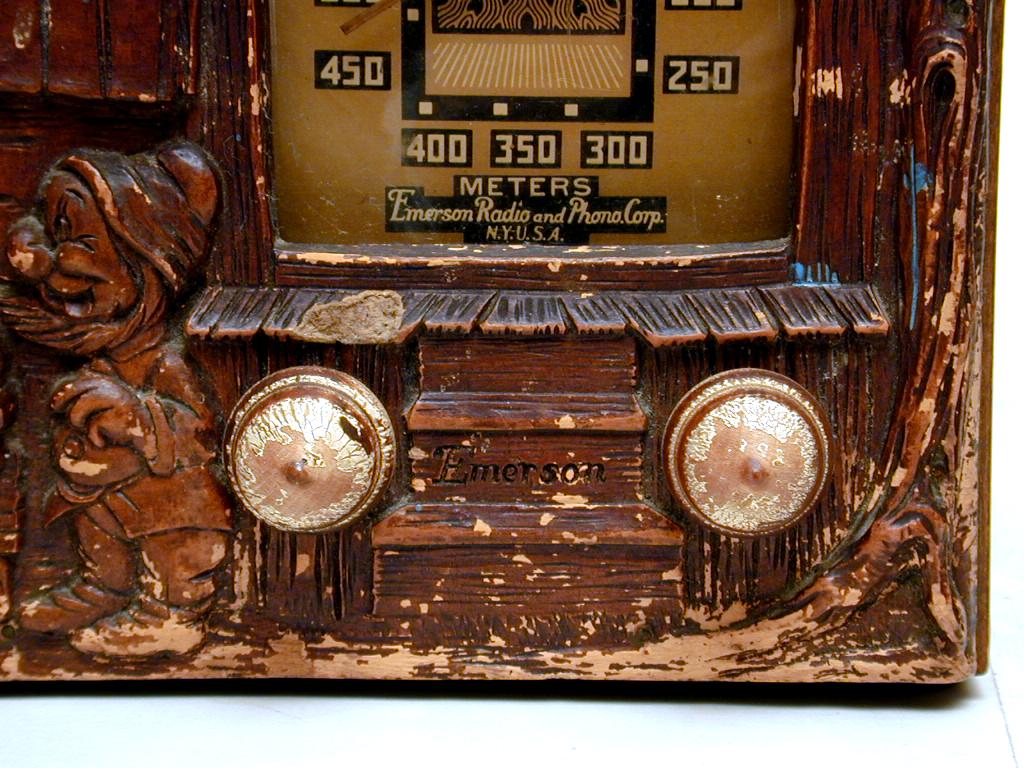
The window of Dwarfs' cottage serves as the opening for the radio's speaker grille, and
the dial appears in the arched door opening to the right. Below the front porch,
flanking the steps, are distinctive acorn-shaped knobs.

The figural cabinet front is made of "repwood," a molded wood product
that we'll describe more fully later. The rest of the cabinet is made of solid wood. As this
photo shows, the entire cabinet was worn and needed refinishing.
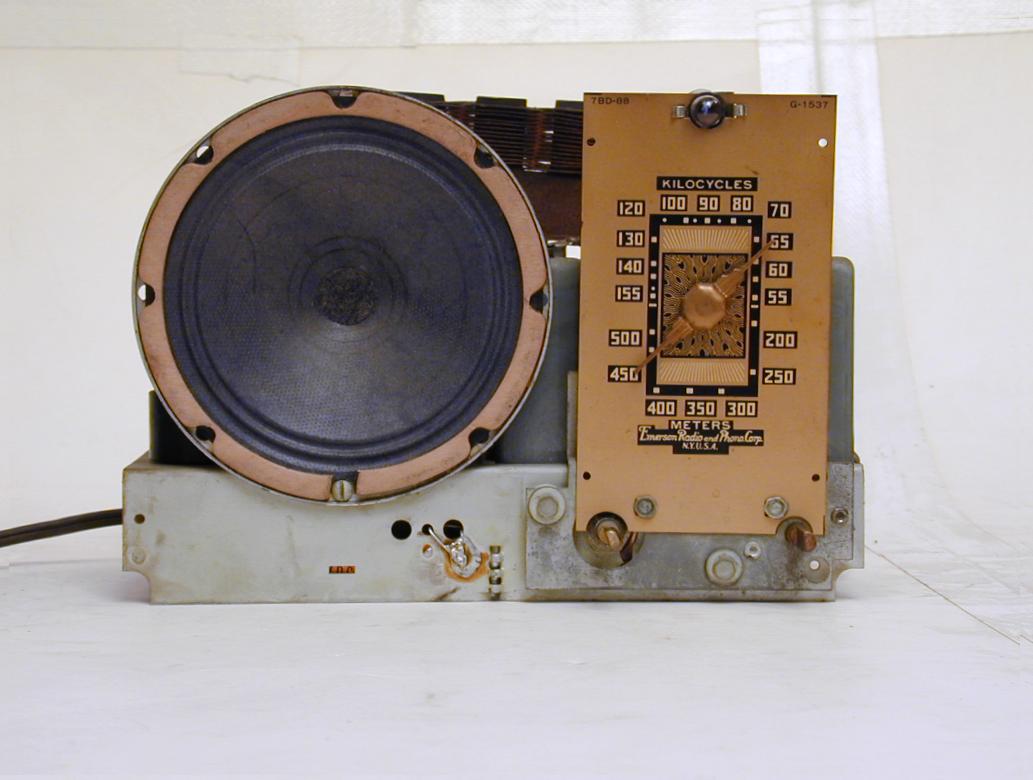
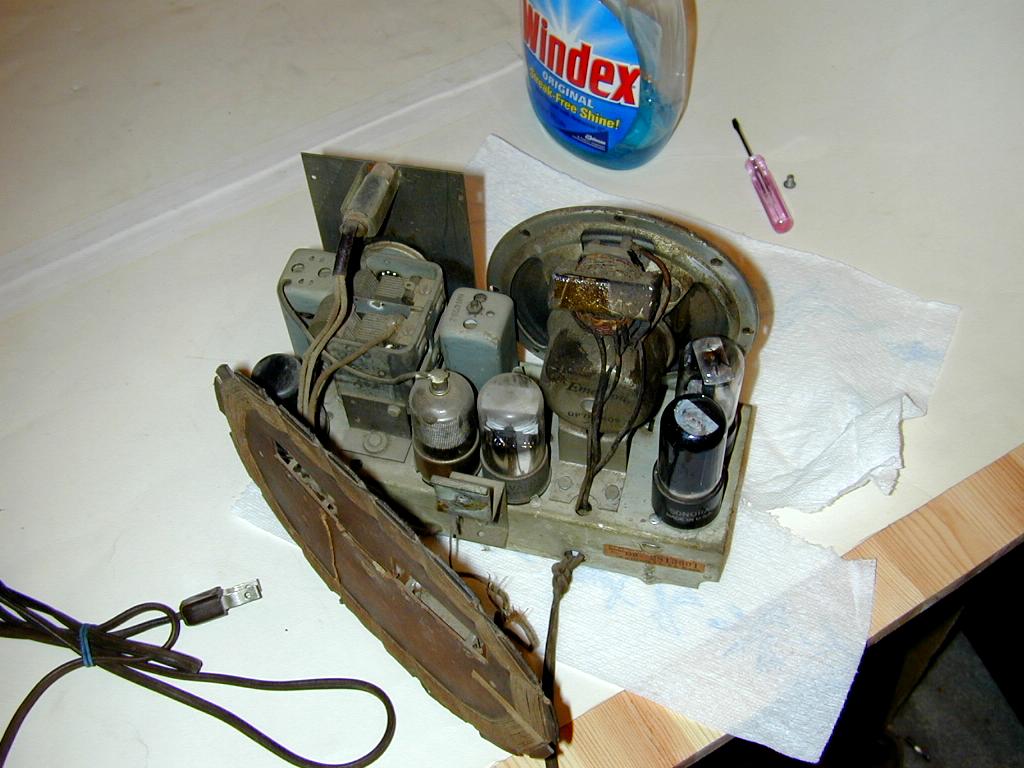
Inside the cabinet is a standard "All American Five" radio chassis. This photo
shows how dirty it was when I first bought the set.

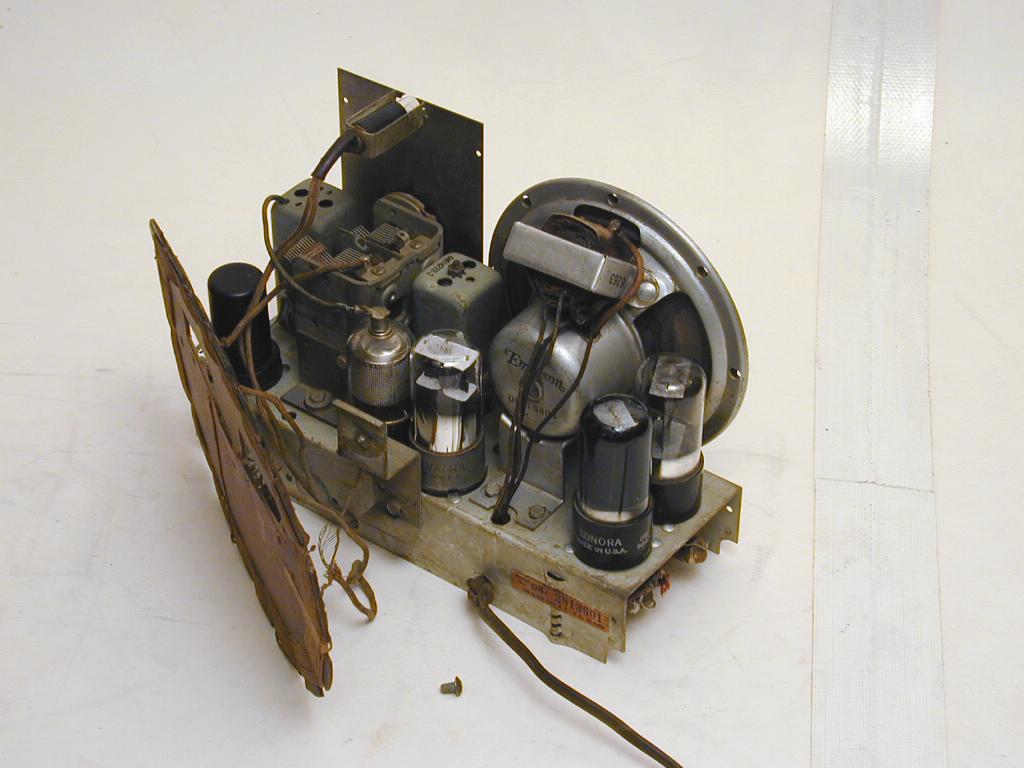
The chassis looked better after an initial cleanup.

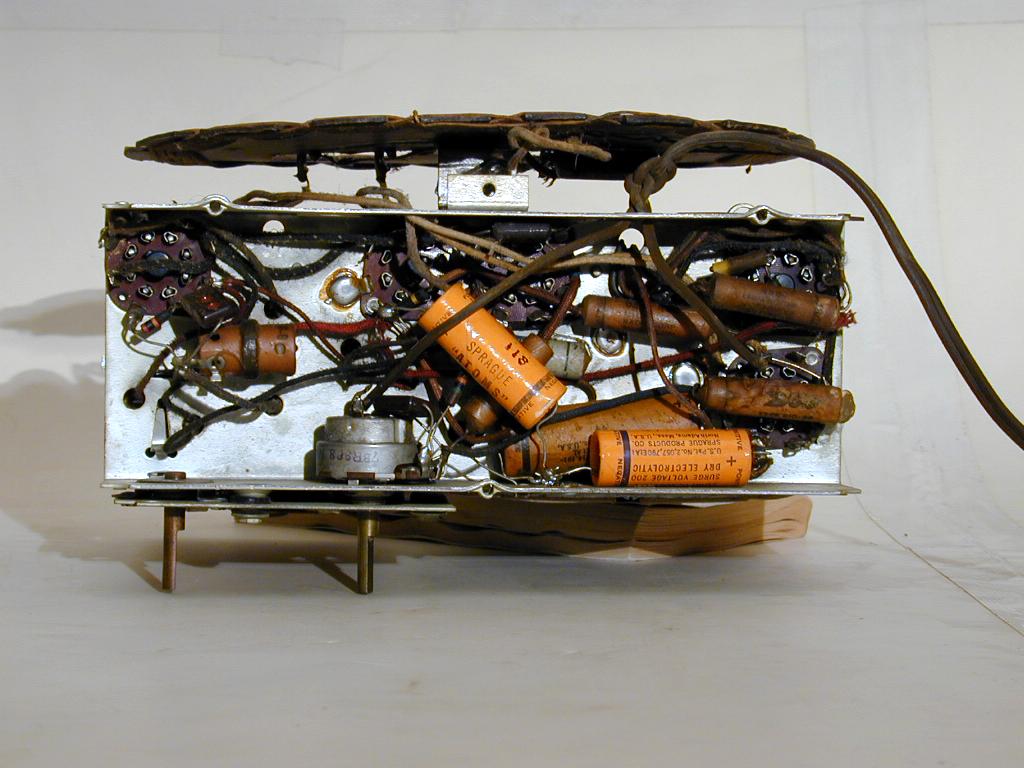
The next two photos show the chassis from underneath and from the front.

A Note on the Model Number
Emerson produced this radio with at least two
different model numbers, BM-247 and DB-247. The two-letter prefix identifies the
chassis type and the three-number suffix identifies the cabinet.
The full model number is normally shown on the fiberboard back, but as with many radios,
my radio's back is missing. If you look at the rear chassis view, however, you'll see a little
sticker printed with DB followed by a serial number. Thus, the full model number
for my radio is DB-247.
The DB chassis was used with a few different cabinets.
If you are looking for a DB-247 schematic,
from Nostalgia Air
or some other source, you can use any Emerson schematic starting with
DB (for instance, DB-301).
Two Versions of Snow White
Emerson produced two different versions of the Snow White radio, this one
and a smaller version, model Q236.
The cube-shaped model Q236 was painted in bright colors, whereas
model 247 is dark brown. The smaller radio uses the same molded design, but
the cottage has no door and the dial is placed inside the cottage window, with
the knobs located among the capering figures.
Here is a photo of my Q236 Snow White radio, next to a photo of this set for
comparison. You can read more about the Q236 in the corresponding
article.

Emerson also produced two cube-shaped Mickey Mouse radios in 1933.
Model 410 had
a black and silver front with metal trim and a painted figure of Mickey playing a cello.
Model 411
had molded repwood panels with Mickey figures on the front, sides, and top.
What Is Repwood?
The front of this cabinet is made of "repwood," which is a mixture
of ground wood and a glue or binder, compressed with a mold. Repwood was used
for many different decorative items in the 1930s, since it could be molded into
detailed shapes and finished to match other wood parts.
After finishing with the same colored lacquers used for the rest of the cabinet—or
even brown paint—the repwood looked just like a wood carving at a fraction of the cost.
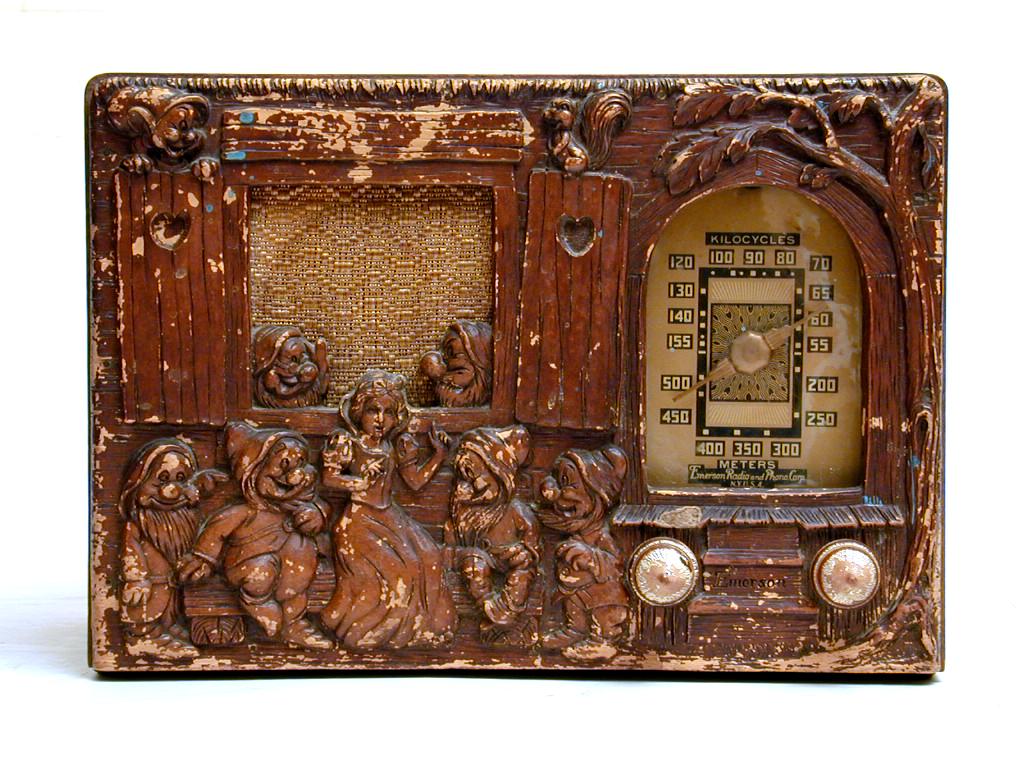
Many repwood objects show considerable wear, which exposes the light color of the underlying material.
The front of this Snow White cabinet showed typical wear. On high-relief details, such as the caps and
noses of the Dwarfs, or the cabinet edges, the original dark finish was worn away. The top area of the window
shutter also showed wear—perhaps where people grasped the cabinet when moving it—and it sported a few
drips of aqua paint here and there.
Cabinet Restoration
I had read reports about various types of repwood, stating that some were not very durable.
This cabinet proved to be sturdy, however. When I began stripping the wooden top and sides of the cabinet,
I accidentally dripped some stripper onto the repwood face. I cleaned it up quickly, and then I
noticed that the stripper hadn't damaged the repwood at all. When I gently applied some more, the
old finish came off easily:


Not only was the original form intact, but stripping revealed details that were not evident before.
Stripping a figured surface like this requires more work than stripping a flat surface.
It took three applications to clean up all the details.
After letting the stripper work for a while, I wiped off the excess with paper towels and then washed the face with
paper towels soaked in lacquer thinner. While the surface was still wet, I went over all of the details with
a soft toothbrush, using more lacquer thinner to wash old material out of the details.
The only flaw in the panel is a small broken spot in one of the porch boards. I suppose you could try
to repair that with plastic wood, but I decided to leave it as a mark of age. Even the Seven Dwarfs might have had a broken
board on their porch, after all!
Reproducing the Panel
Since my repwood panel was in nice shape, I decided to make a reproduction,
to learn about making molds and castings.
There are lots of casting materials to choose from. After doing a little research, I chose
a urethane product from the Smooth-On company.
While waiting for the kit to arrive in the mail, I removed the front panel from the cabinet. It is
held on by more than a dozen thin nails. I cut a short strip of wood to distribute the stress and then
gently tapped the panel out with a hammer from inside the cabinet, going around and around several
times until all of the nails had released. This method is safer than prying the panel loose
from the front, which might gouge the cabinet or break the panel.
Although the panel had withstood paint stripper without damage, I was concerned about the chemicals
(sealer and release agent) supplied with the mold-making product. To protect against damage, I
sealed my original panel with a light coat of clear shellac.
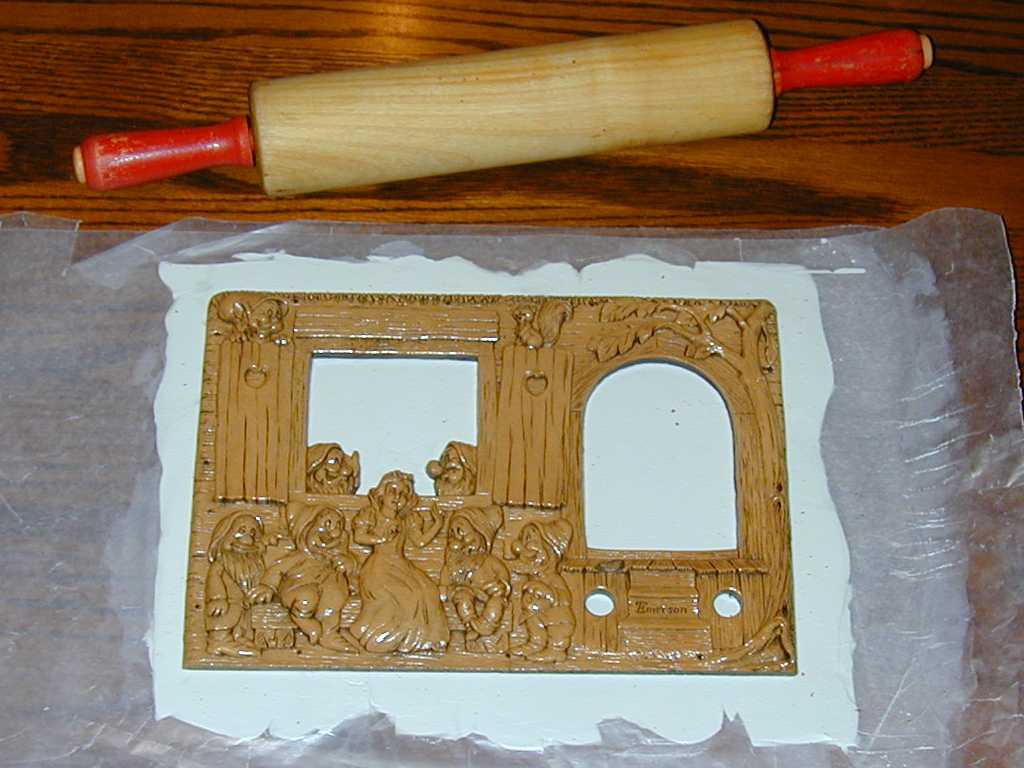
To make a one-piece mold of this type, you can roll out a thin bed of modeling clay and build a
containing structure to hold the poured mold material. I smeared a very thin layer of clay onto the
back of my original and then pressed it firmly into the clay bed:

To ensure a good mold, you want the back to be perfectly flat. I did this work on a piece of glass,
covered with wax paper.
The next photo shows how I built a containing structure from strips of cardboard.
The strips were pressed into the clay and then secured at the corners with a hot glue gun. Then I went
around all the inner edges of the clay bed with a modeling tool, making sure there would be no leaks
when I poured the mold material. I also formed up the outer clay edges to make a nice, straight mold.
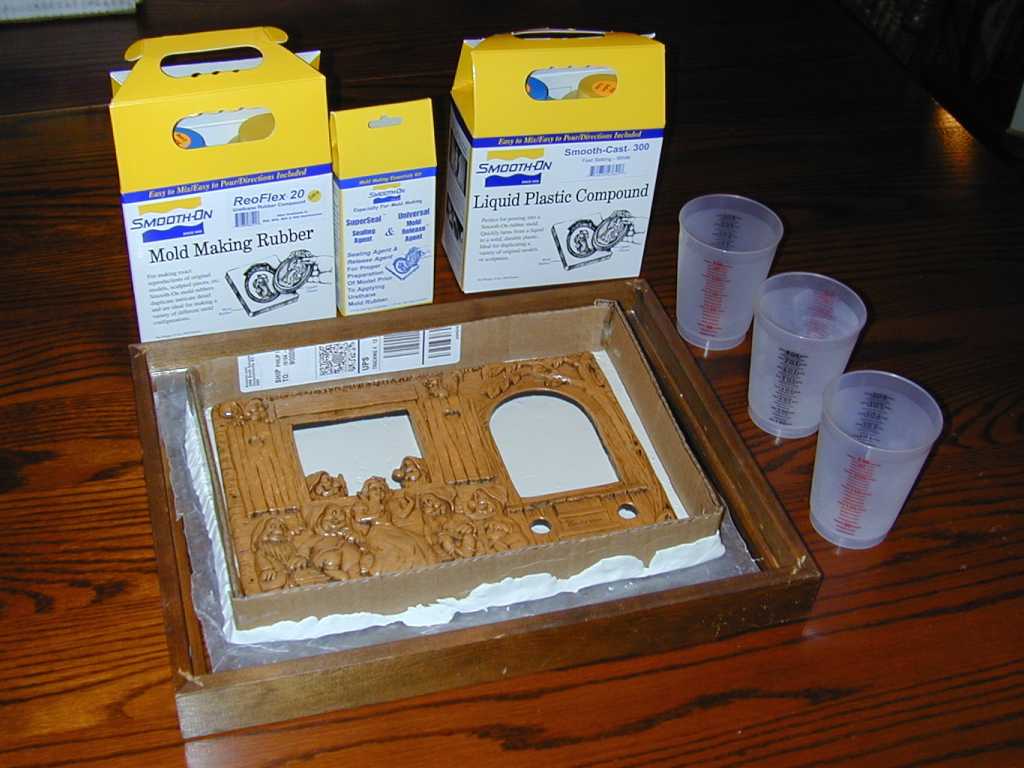
Before pouring the mold, I needed to calculate the volume of mold material
that would be needed. If you mix too little molding material, you'll end up
with a useless mold and have to start over. If you mix too much, you'll waste some of
this rather expensive stuff.
Note that some molding/casting materials are measured by volume, while others are measured by weight.
I chose a volume-measured material because I didn't want to buy an expensive weight scale (no,
postage scales are not accurate enough).
To find the volume, I poured fine-grained dry rice over my model in its container until the rice was at least
3/8 inch above the highest part of the model. Then I shook the whole thing to settle the grains and
added a little more to account for the air spaces between the grains. I poured the rice from
the model into a measuring cup, wrote down the needed volume, and added just a smidgen more.
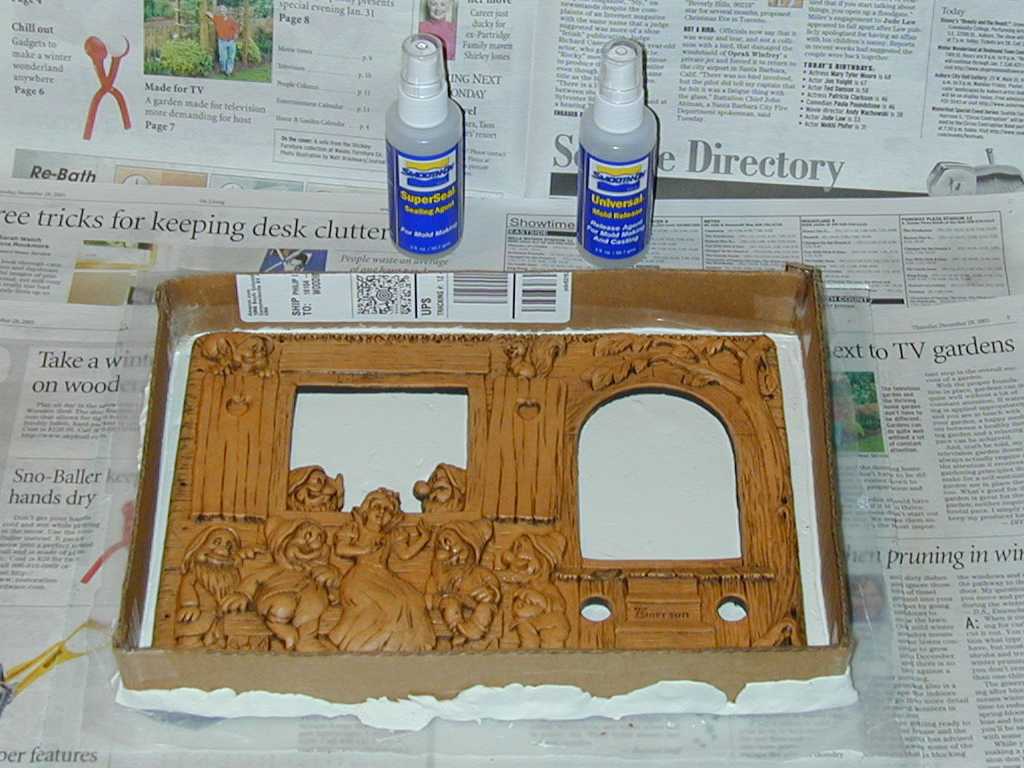
The next step was to apply the Smooth-On sealer, followed by the mold release agent. This step is
vital if you don't want the mold to bond permanently to your original piece!

Using my measuring cups, I mixed equal amounts of mold materials A and B into a clean plastic container, stirred
them for the prescribed time period, and then slowly (v-e-r-y slowly) poured the mold material over my original panel.
Notice the carpenter's levels on two sides of the work area: this ensures that a casting made from this
mold will have an even depth all around.

After the mold had cured, it was time to remove it from the original. I carefully cut
away the cardboard retaining structure and then, with the original upside down,
peeled the clay bed away from its back. The back of the original panel looks mottled and
ugly, but that's how it came out of the factory. (If you are buying a Snow White radio and
wondering whether its panel is a fake, look at the back.)

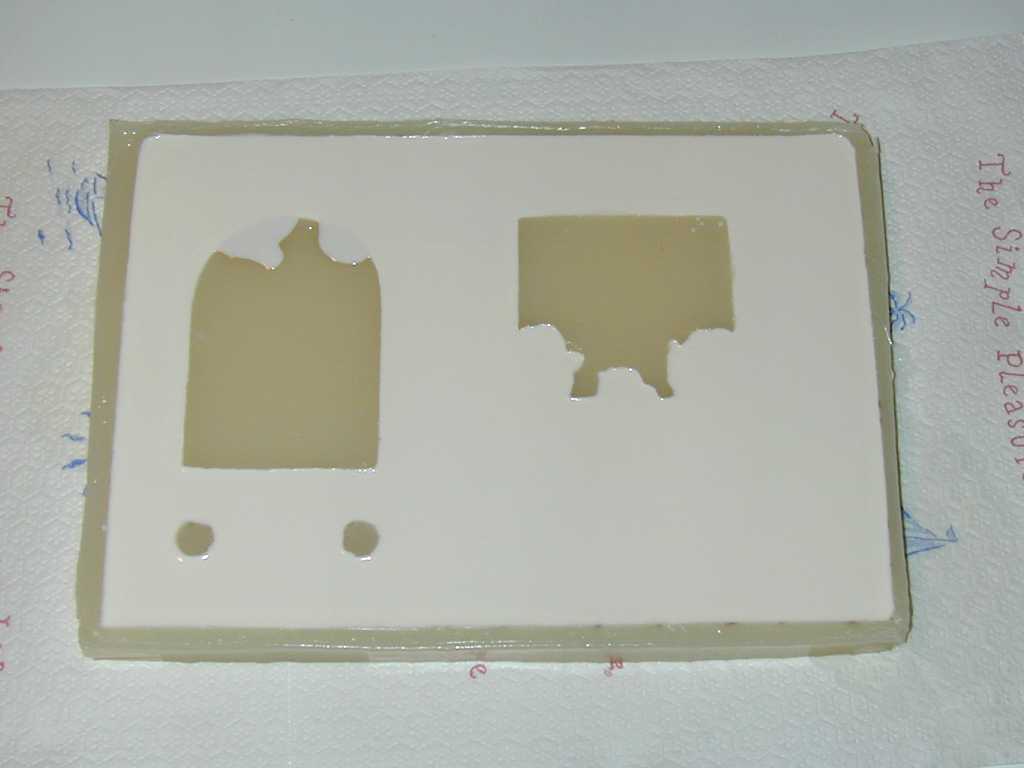
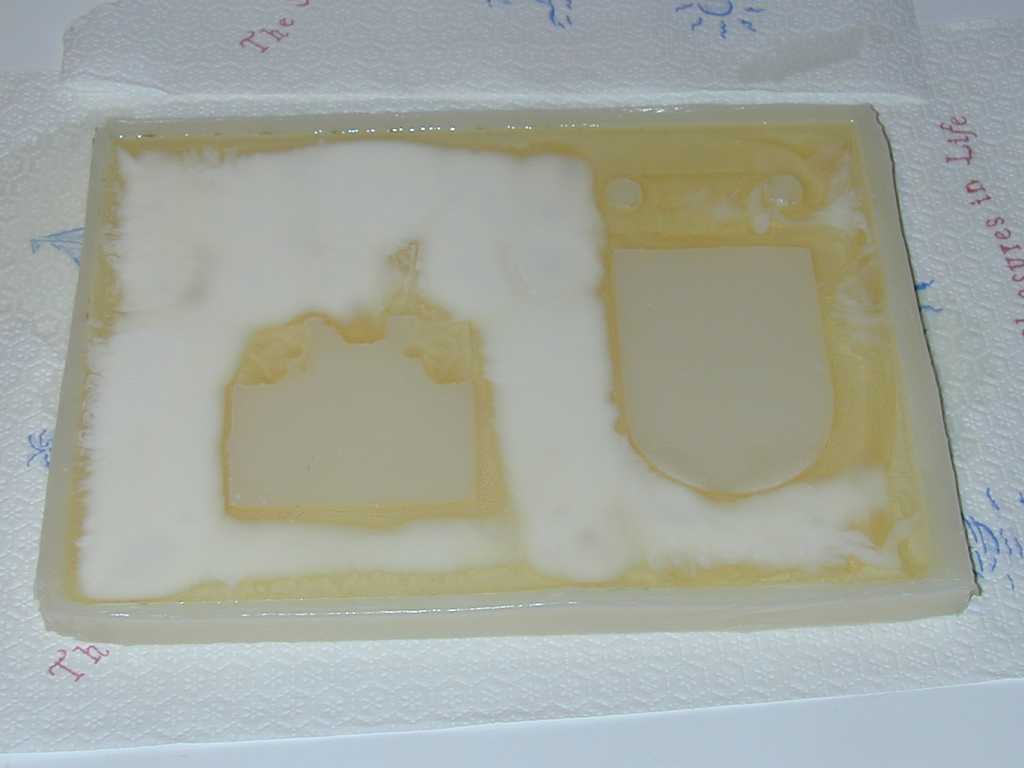
The next photo shows the mold before I trimmed out the holes for the radio knobs.
To my relief, sealing the original with shellac, followed by the Smooth-On
sealer and release agent, had prevented any damage to the panel. Still, peeling the mold from the
original was a delicate process that took the better part of an hour. If I
had to do it over again, I would apply extra shellac to the rough outer edges of
the original.

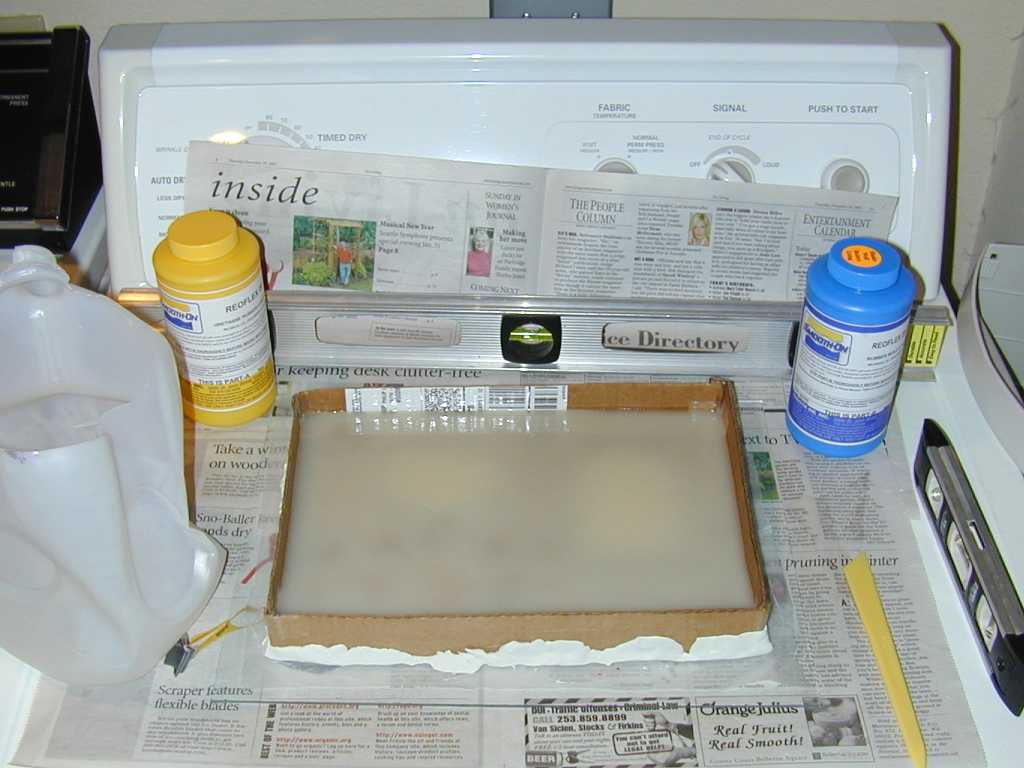
Next, I washed the mold to prepare for the first practice casting. Again, it's
necessary to measure the amount of casting material you'll need to fill the mold.
After washing the mold, I carefully filled it with water and then poured the
water into a measuring cup to determine how much casting resin would be required.
I dried the mold with a soft, lint-free cloth and warmed it with a hair dryer to remove
every last water drop. Next, I applied release agent to the mold, following the
manufacturer's directions (spray, brush, spray, and so on).
Finally, it was time to mix the casting material and pour. For a casting of this type, with large
open areas, it's important to pour on a level surface, to avoid heavy flashings that
will be laborious to trim out later.
The next photo shows the mold while curing. This type of casting urethane
looks clear when mixed, but turns white over the period of a few minutes. It also generates heat.

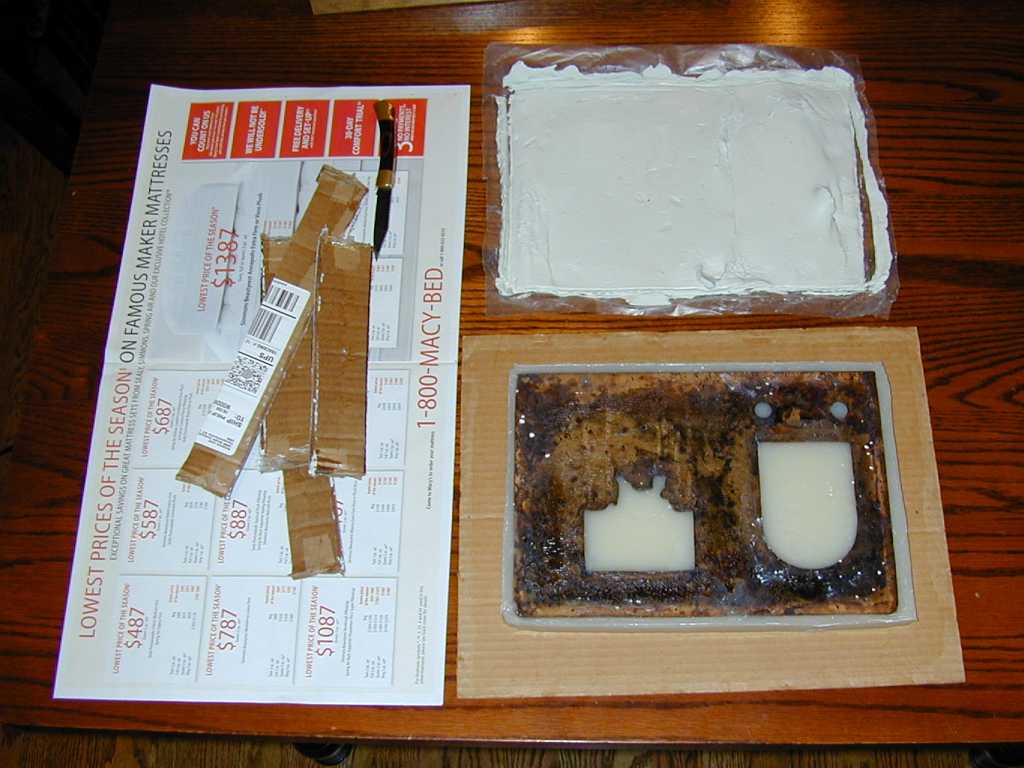
The cured casting looks pretty good. Only a little bit of pour-over on top of the cottage door,
which will be easy to trim off.
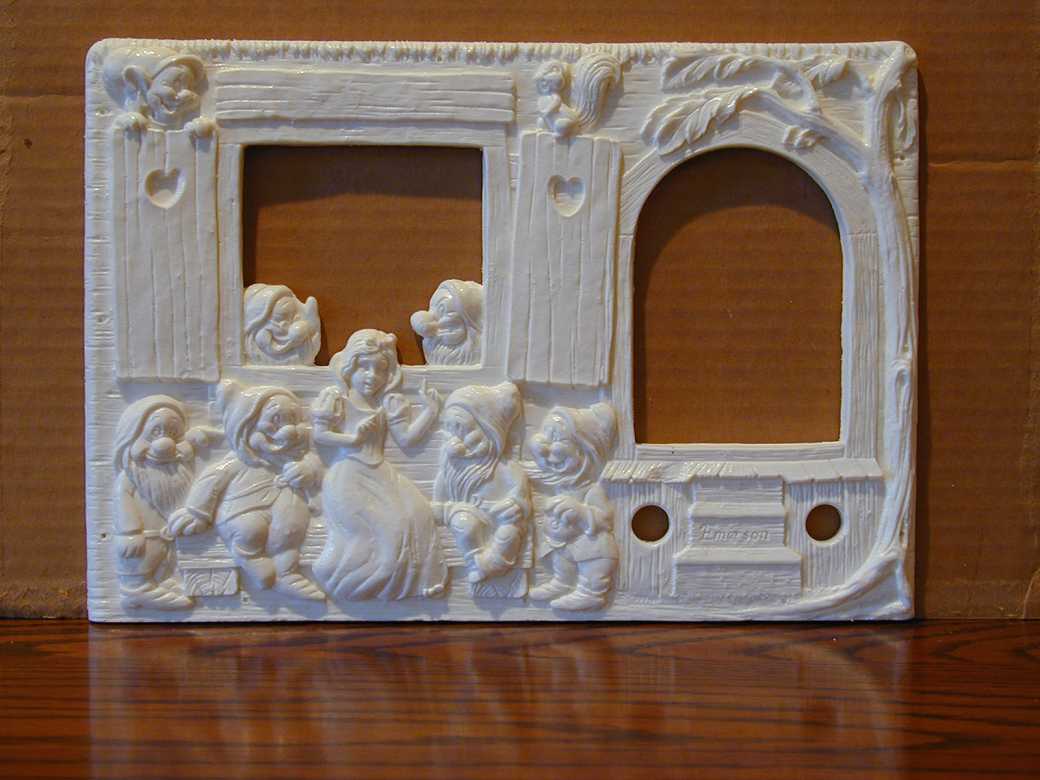
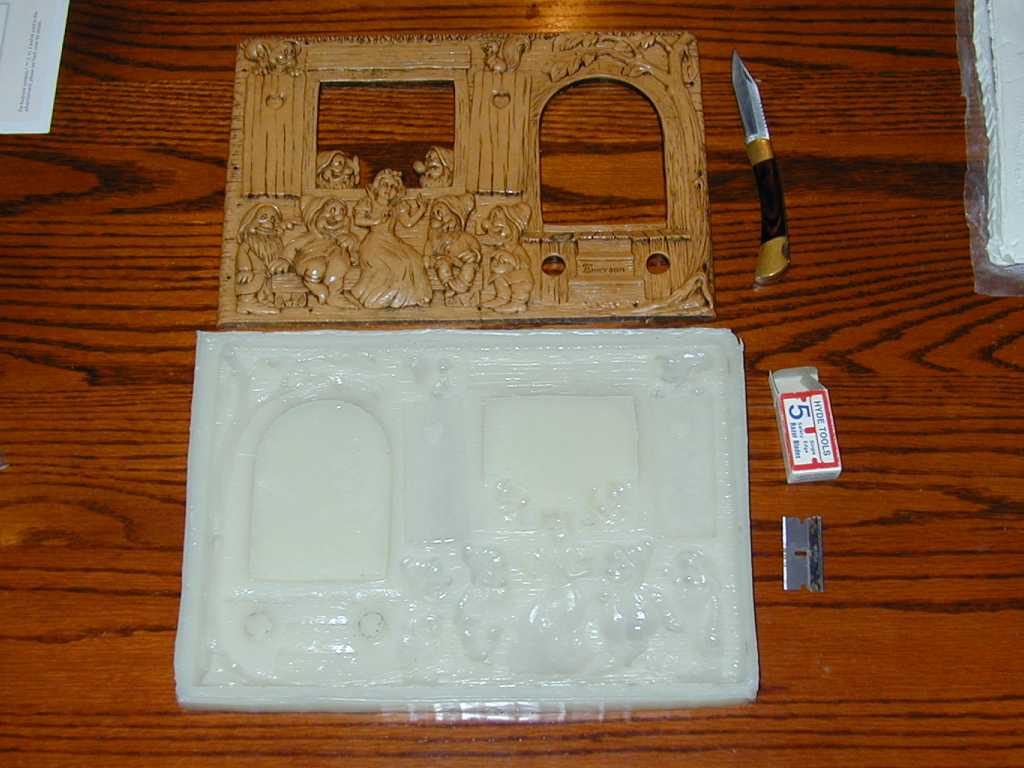
After making sure the cast had cured sufficiently, I carefully peeled the mold away. Here is the result:
It's a pretty faithful reproduction of the original panel, even including guide holes for each of the tiny nails used
to secure it to the cabinet. It took a couple of tries to get a panel this good.
It will pass casual inspection from a few feet away, but if you examined it side by side with
the original, you'd notice tiny imperfections.
Bubbles are the bane of reproduction
makers, as I quickly learned. Follow the manufacturer's directions very carefully! People who make reproductions
for a living invest in expensive vacuum chambers that eliminate bubbles in the mold material as well as
the casting material.
I wasn't willing to spend more on equipment than I paid for the radio in the first place, so I did the best I could.
After making a bubbly first casting, I read about using agitation to help bubbles rise to the top. I had made the first casting
on top of our clothes dryer in the laundry room, so it occurred to me to turn on the dryer during the second casting.
I threw some old jeans and sweatshirts into the dryer, for good measure. Sure enough, the combination of gentle bottom
heat and gentle agitation during the initial curing period made a difference. The second casting was noticeably
superior to the first one.
I haven't decided what to do with my reproduction panels. Maybe I'll just hang them on the workshop wall as decorations,
or make some kind of clock for one of my young nieces.
If you're shopping for a Snow White radio, be aware that these panels are not difficult to reproduce. It's easy to
tell a fake from an original, however. Look inside the back of the radio. If the back of the panel is as smooth
as glass, it's a fake. The back of my original panel is rough and irregular in color. Another test
would be to scrape the back or edge of the panel with a sharp knife or a pin. If you see brilliant white material
underneath, it's a fake!
Finishing the Cabinet
After I cleaned the front panel and reattached it to the cabinet, I sprayed the complete cabinet
with brown toning lacquer until the color looked right. I followed this with a couple of light coats of
clear satin lacquer for protection.
I decided not to make the cabinet quite as dark as it was before. The old finish was extremely
dark—almost black in places—and so muddy that it obscured many details. Who knows, perhaps the original finish
had darkened over the years or somebody had tried to re-stain it to conceal the wear.
In any case, after bringing Snow White and her friends back into the light, I didn't want to hide
them under a too-dark finish. If I change my mind about the color later on, I can always darken it
with more toner.
Final Thoughts
This restored Snow White looks great alongside its other repwood friends.

I haven't restored the electronics yet. The simple radios inside these novelty sets are
nothing to write home about, and I have a house full of high-performance radios to listen to.
For now, I'm content to leave the electronics alone. Sooner or later, this radio
will belong to someone else, and I'll let that person decide whether to restore the
chassis or leave it untouched.
|